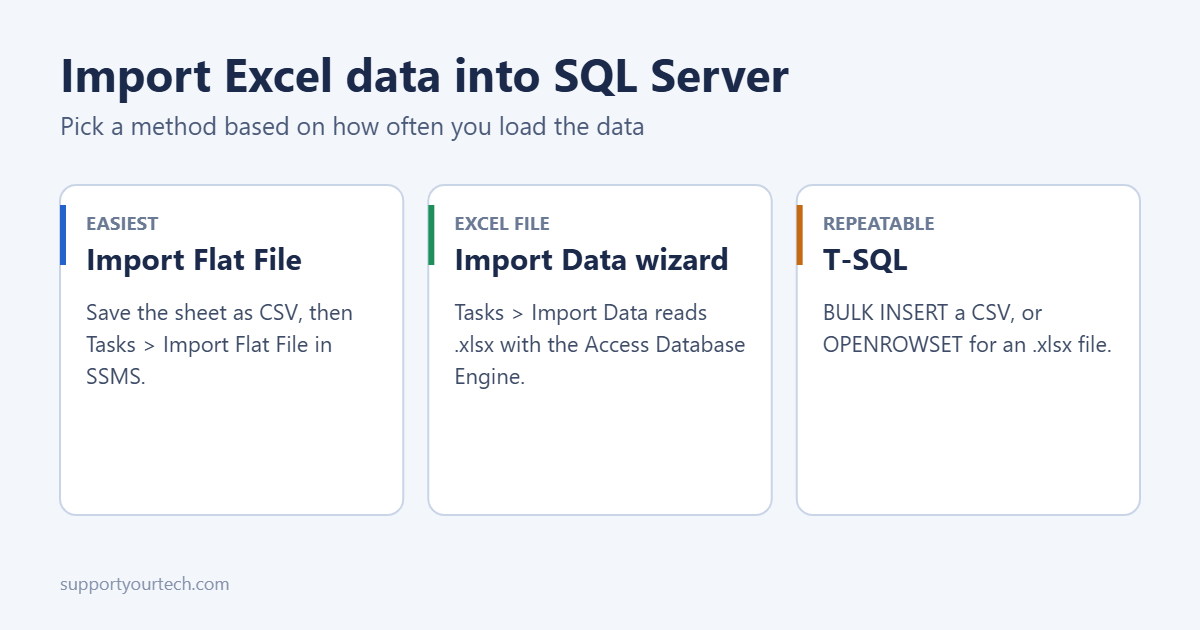
The most reliable way to import Excel data into SQL Server is to save the sheet as a CSV file and use Import Flat File in SQL Server Management Studio (SSMS): right-click the database, choose Tasks > Import Flat File, pick the CSV and follow the wizard. To import an .xlsx file directly, use Tasks > Import Data, which opens the SQL Server Import and Export Wizard. For loads you’ll repeat, T-SQL with BULK INSERT is quicker. All three are below, along with fixes for the common errors.
Step 1: Prepare the spreadsheet
Most import errors come from the spreadsheet, not SQL Server. Before you start:
- Keep one table per sheet, with column headings in row 1 and no merged cells, blank rows, totals or notes.
- Use simple headings without special characters, such as
OrderDateinstead of “Order date (UTC)”. - Make each column one type. A column with numbers and the word “N/A” will be read as text or fail.
- Format dates consistently, ideally as
YYYY-MM-DD. - Remove leading zeros you don’t need, or format those columns as text so they survive (ZIP codes, product codes).
Method 1: Save as CSV and use Import Flat File
This method needs no extra drivers and handles data types well.
- In Excel, go to File > Save As and choose CSV UTF-8 (Comma delimited). Only the active sheet is saved.
- Open SSMS and connect to your server.
- In Object Explorer, right-click the target database and choose Tasks > Import Flat File.
- Browse to the CSV, then enter a name for the new table.
- On Preview Data, check the first rows look right.
- On Modify Columns, check each column’s data type, length and whether it allows nulls. Set a primary key if you have one.
- Click Finish. SSMS creates the table and loads the rows.
Import Flat File always creates a new table. To add rows to an existing table, import into a staging table, then run INSERT INTO dbo.Orders SELECT ... FROM dbo.Orders_Staging.
Method 2: Import the .xlsx with the Import and Export Wizard
- In SSMS, right-click the database and choose Tasks > Import Data. You can also open SQL Server Import and Export Data from the Start menu.
- For Data source, choose Microsoft Excel, browse to the file and pick the Excel version. Leave First row has column names checked.
- For Destination, choose Microsoft OLE DB Driver for SQL Server, then your server and database.
- Choose Copy data from one or more tables or views.
- Tick the sheet (shown as
Sheet1$) and set the destination table name. Click Edit Mappings to check column types. - Click Next, choose Run immediately, then Finish.
If Microsoft Excel isn’t in the data source list
The wizard reads Excel files through the Microsoft Access Database Engine (ACE OLEDB provider), which isn’t always installed. Install the Access Database Engine redistributable from Microsoft, and match its bitness to the wizard: the 64-bit wizard needs the 64-bit engine. If you have 32-bit Office installed, run the 32-bit version of the wizard instead. Microsoft explains the requirements in Connect to an Excel data source.
Method 3: T-SQL for repeat loads
BULK INSERT a CSV
Save the sheet as CSV in a folder the SQL Server service can read, create the table, then run:
BULK INSERT dbo.Orders FROM 'C:\Data\orders.csv' WITH (FORMAT = 'CSV', FIRSTROW = 2, CODEPAGE = '65001');
FIRSTROW = 2 skips the header row, and CODEPAGE = '65001' reads UTF-8 so accented characters come through. FORMAT = 'CSV' handles quoted values with commas and needs SQL Server 2017 or later. The path is on the server, not your PC.
OPENROWSET for an .xlsx file
If the Access Database Engine is installed on the server, you can query the workbook directly:
SELECT * INTO dbo.Orders_Staging FROM OPENROWSET('Microsoft.ACE.OLEDB.16.0', 'Excel 12.0;Database=C:\Data\orders.xlsx;HDR=YES', 'SELECT * FROM [Sheet1$]');
This requires the server option Ad Hoc Distributed Queries to be enabled, which many administrators keep off for security. Ask your DBA before changing it.
Common errors and fixes
| Error | Cause | Fix |
|---|---|---|
| “The Microsoft.ACE.OLEDB provider is not registered” | Access Database Engine missing or wrong bitness | Install the matching 32-bit or 64-bit engine, or use the CSV method |
| “Text was truncated” or “Data conversion failed” | A value is longer than the column or the wrong type | Widen the column in Edit Mappings or Modify Columns, or clean the data |
| Numbers or dates imported as NULL | The driver guessed the type from the first rows | Make the column one type in Excel, or import as text and convert in SQL |
| “Cannot bulk load. The file could not be opened” | The path is on your PC, not the server | Copy the file to a folder on the server that the SQL Server service can read |
| Strange characters (é shows as é) | Encoding mismatch | Save as CSV UTF-8 and use CODEPAGE 65001 |
Check the result
Run SELECT COUNT(*) FROM dbo.Orders; and compare the number with the rows in Excel (minus the header). Spot-check a few dates, decimals and text values with leading zeros. If something’s off, drop the table, fix the spreadsheet and import again.
Frequently asked questions
Do I need SQL Server installed on my PC?
No. SSMS can import into any server you can connect to. If you want a local server for practice, see how to install SQL Server on Windows 10.
Can I import several sheets at once?
Yes, with the Import and Export Wizard. Tick each sheet on the Select Source Tables screen, and each becomes its own table.
What about Azure SQL Database?
Import Flat File works the same way. BULK INSERT and OPENROWSET can’t read files from your PC there, so upload the CSV to Azure Blob Storage first, or use the CSV method.
Summary
- Clean the sheet: one header row, one type per column.
- Save it as CSV UTF-8.
- In SSMS, right-click the database and choose Tasks > Import Flat File.
- Check column types, finish, and confirm the row count.

Matt Jacobs has been working as an IT consultant for small businesses since receiving his Master’s degree in 2003. While he still does some consulting work, his primary focus now is on creating technology support content for SupportYourTech.com.
His work can be found on many websites and focuses on topics such as Microsoft Office, Apple devices, Android devices, Photoshop, and more.