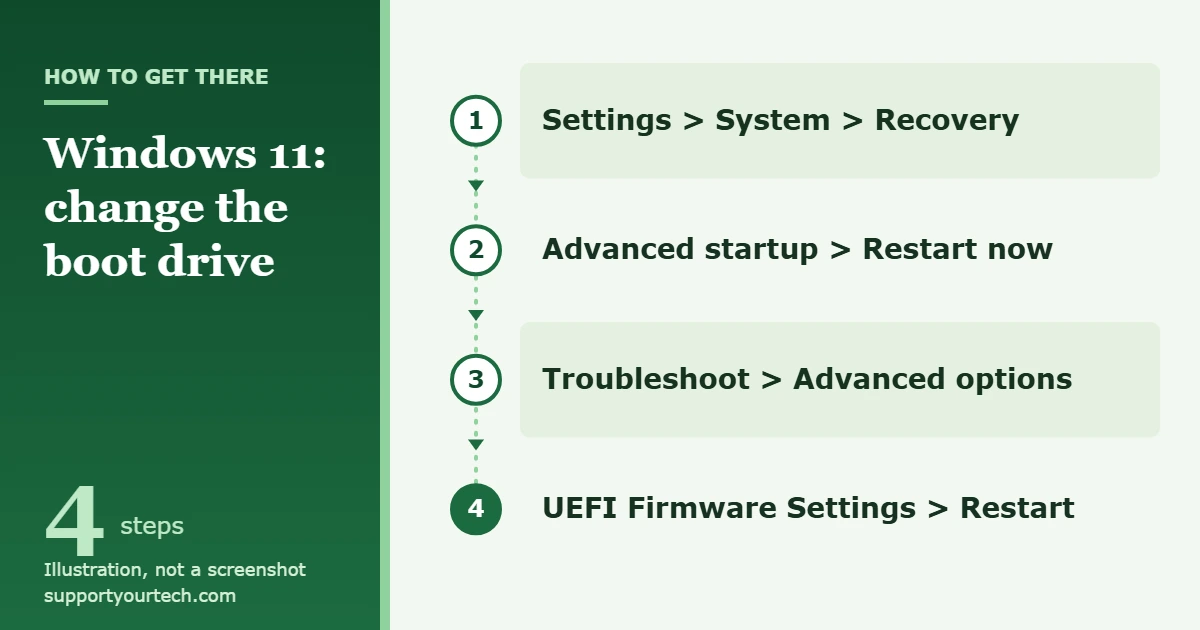
To change the boot drive in Windows 11, open Settings > System > Recovery, select Restart now next to Advanced startup, then choose Troubleshoot > Advanced options > UEFI Firmware Settings > Restart. In the firmware’s boot section, move the drive you want to the top of the boot order and save. To start from another drive just once, choose Use a device on the same blue screen instead.
Applies to: Windows 11 on PCs with UEFI firmware. Checked against Microsoft Support on October 7, 2026.
What “changing the boot drive” means
The boot drive is the drive your PC starts Windows (or another operating system) from. The choice is not made inside Windows. It is made by the PC’s firmware, the small built-in program that runs the moment you press the power button. On Windows 11 PCs that firmware is UEFI, which many people still call the BIOS. The firmware keeps a list called the boot order (some makers call it the boot sequence or boot priority) and tries each entry in turn.
People mean a few different things by “change the boot drive.” Pick the row that matches your goal, because the right method is different for each.
| What you want | What to do |
|---|---|
| Start from a USB installer or recovery drive one time | Use Use a device in Windows, or your PC’s boot menu key. The normal boot order stays as it was. |
| Always start from a different drive that already has Windows on it | Change the boot order in UEFI firmware settings. |
| Move Windows to a new SSD and start from that | Put Windows on the new drive first (clone or clean install), then change the boot order. |
| Pick which Windows installation starts by default on a dual-boot PC | Change the default entry in the Windows boot menu. The drive order in firmware may not need to change at all. |
One thing that does not change the boot drive is swapping drive letters. Drive letters such as C: and D: are handed out after Windows has already started, so renaming them has no effect on which drive the PC starts from.
Before you start
- Make sure the target drive is bootable. A drive that only holds files, or one you copied the Windows folder onto, cannot start a PC. A Windows drive set up for UEFI has several partitions. Microsoft’s default layout is a system partition, a small reserved partition, the Windows partition and a recovery partition. The first of these, the EFI System Partition, is the one the device boots to.
- Find your BitLocker recovery key. If your drive is encrypted, boot-related changes can make Windows ask for the 48-digit recovery key at the next start. Microsoft lists changes to the boot manager, moving a protected drive into another computer, and (on older TPM 1.2 devices) changing the firmware boot device order among the triggers. For a personal PC the key is usually stored in your Microsoft account at aka.ms/myrecoverykey. Check that you can see it before you change anything. See Microsoft’s guide to finding your BitLocker recovery key for the other places it can be.
- Back up your files. Changing the boot order does not erase anything. Cloning a drive or installing Windows can, so copy anything important to an external drive or cloud storage first.
- Know which drive is which. Right-click the Start button and select Disk Management. Note the size and disk number of each drive (Disk 0, Disk 1 and so on) and which one holds C:. Firmware menus usually list drives by model name, so it also helps to know the brand and capacity of each drive.
Change the boot order in UEFI firmware settings
Use this method to make a different drive the permanent first choice. Steps 1 to 4 are the same on every Windows 11 PC. The firmware screens in steps 5 to 7 are made by your PC or motherboard maker, so the wording there differs from one brand to another.
- Save your work and close your apps. The PC is about to restart.
- Select Start > Settings > System > Recovery. The Recovery options list opens.
- Next to Advanced startup, select Restart now. The PC restarts to a blue Choose an option screen. This is the Windows Recovery Environment, often shortened to Windows RE.
- Select Troubleshoot > Advanced options > UEFI Firmware Settings, then select Restart. The PC restarts again and opens the firmware setup screen instead of Windows.
- Find the boot settings. Look for a tab or section with “Boot” in its name, such as Boot, Boot Order, Boot Sequence, Boot Priority or Boot Configuration. Simple firmware screens use the arrow keys and Enter. Many newer ones also work with a mouse.
- Move the drive you want to the first position in the list. The firmware shows how to reorder on screen, usually in a key legend along the bottom or side. If the drive holds Windows, its entry may be named Windows Boot Manager, sometimes followed by the drive’s model name. Windows Boot Manager is the Microsoft program the firmware launches to start Windows, so that entry is the right one to pick for a Windows drive.
- Save and exit. Look for an option such as Save & Exit or Apply Changes, and confirm when asked. If you leave without saving, the old order stays in place. The PC restarts and tries the drive you put first.
Change only the boot order while you are in there. Firmware setup also holds settings for Secure Boot, storage controllers and the processor, and changing those by accident can stop Windows from starting.
Boot from another drive one time
If you only need to start from a USB installer, a recovery drive or a second drive once, leave the boot order alone and pick the device for a single start. That way the PC goes back to its normal drive next time without any further changes.
From inside Windows
- Plug in the bootable USB drive, if that is what you are starting from.
- Select Start > Settings > System > Recovery.
- Next to Advanced startup, select Restart now.
- On the Choose an option screen, select Use a device. A list of bootable devices the firmware can see appears.
- Select the device you want. The PC restarts and starts from it.
A shortcut to the same blue screen: open Start, select Power, then hold the Shift key while you select Restart.
With the boot menu key
Most PCs also have a boot menu that appears when you press a certain key right after switching on. The key is set by the manufacturer. Microsoft lists Esc, Delete, F1, F2, F10, F11 and F12 as the common keys for firmware and boot menus, and volume up or volume down on tablets. On Dell computers, for example, F12 opens the One Time Boot Menu and F2 opens setup. Dell’s advice applies to any brand: tap the key about once a second as the logo appears instead of holding it down.
In a boot device menu you may see the same drive listed twice, once with a UEFI label and once with a BIOS or legacy label. They are the same device started in two different firmware modes. For Windows 11, pick the UEFI entry.
Other ways to open firmware settings
If the Settings route does not suit you, these lead to the same firmware setup screen.
- Press the setup key at startup. Turn the PC on and tap the manufacturer’s key (see the list above) before Windows begins to load. Your PC maker’s support site or manual gives the exact key for your model.
- Use a command. Open Command Prompt or Windows Terminal as an administrator, type shutdown /r /fw /t 0 and press Enter. The /r switch restarts the PC, /fw sends the next restart to the firmware interface, and /t 0 sets the wait to zero seconds. Save your work first, because the restart is immediate.
- On a Surface. Shut the device down, press and hold the volume-up button, then press and release the power button. Keep holding volume-up until the Surface UEFI screen appears. Select Boot configuration and drag an entry such as USB Storage to the top of the list, then select Exit > Restart Now.
Make a new SSD your boot drive
Fitting a new SSD and moving it to the top of the boot order is not enough by itself, because an empty drive has nothing to start. Windows has to be on the new drive first. There are two ways to get it there.
Option 1: Clone the old drive
Cloning copies everything on the old drive, including the hidden startup partitions, onto the new one. You keep your apps, files and settings. Cloning needs separate software. Some SSD makers offer a migration tool for their own drives, so check your SSD maker’s support site first. Whichever tool you use, make sure it copies the whole disk and not only the C: partition. A clone that leaves out the EFI System Partition will not start. Our walkthrough on how to clone a hard drive in Windows 11 covers the copying stage.
When the clone finishes, shut down, then follow the steps in “Change the boot order in UEFI firmware settings” above and put the new drive first.
Option 2: Clean install Windows on the new drive
A clean install puts a fresh copy of Windows on the new drive. Microsoft’s own tool creates the installer, and you need a blank USB flash drive with at least 8 GB of space. Anything already on the USB drive is deleted. Follow Microsoft’s steps to create installation media for Windows, then start the PC from the USB drive using the one-time method above.
Be careful at the screen where setup asks where to install Windows. Every drive in the PC is listed there by disk number, and a clean installation removes personal files from the drive you choose. Compare the sizes with the notes you made in Disk Management so you pick the new SSD and not the drive holding your data. If you have never done this before, our guide on how to do a clean install of Windows 11 walks through the whole installation.
Keep the old drive until you are sure
Do not erase the old drive right away. Use the new one for a few days first. If something goes wrong, you can put the old drive back at the top of the boot order and be working again in a couple of minutes.
Choose which Windows starts on a dual-boot PC
If the PC has two Windows installations, a menu may appear at startup asking which one to load. That menu belongs to Windows Boot Manager, not to the firmware. It reads a small database called Boot Configuration Data (BCD) to decide what to offer and which entry to start when the countdown runs out.
Microsoft’s command-line tool for editing that database is BCDEdit. Its bcdedit /default command sets the entry the boot manager uses when the timeout expires, and bcdedit /timeout sets how many seconds it waits. Running bcdedit with nothing after it lists the current entries. You need an administrator Command Prompt to make changes, and Microsoft notes that you might need to suspend BitLocker before setting BCDEdit options. This is an advanced tool. A wrong entry can stop Windows from starting, so read Microsoft’s BCDEdit /default reference before using it, and prefer the firmware boot order if all you want is to start from a different physical drive.
How to confirm the change worked, and how to undo it
- Let the PC start normally and sign in.
- Right-click the Start button and select Disk Management.
- Find the C: volume in the lower pane and read the disk number and size to its left. If it sits on the drive you chose, the PC started from the new drive.
To undo the change, open the firmware settings again the same way and move the original drive back to the first position, then save. If you used Use a device or the boot menu key, there is nothing to undo, because that choice lasts for one start only.
Troubleshooting
UEFI Firmware Settings is missing from Advanced options
If the option is not there, the PC may be starting in legacy BIOS mode (also called CSM) instead of UEFI mode. Use the setup key at startup instead. Windows 11 itself requires UEFI firmware that is Secure Boot capable, so a PC that came with Windows 11 should have the option.
The PC still starts from the old drive
The usual cause is that the change was not saved. Go back into firmware setup, confirm the new order, and use the save option before you exit. If both drives hold Windows, there may be two Windows Boot Manager entries. Look for the one that includes the model name of the new drive. As a test, you can shut down, unplug the old drive, and see whether the PC starts from the new one. If it does not, the new drive is missing its startup partition and needs to be cloned again or set up with a clean install.
The new drive is not in the boot list
Check these in order:
- The drive is seated and connected properly. Power off and unplug the PC before you open it.
- The drive shows up in Disk Management inside Windows. A brand-new drive may still need to be initialized there before it can be used, and for a UEFI PC the partition style to choose is GPT.
- The drive actually has Windows and its startup partitions on it. A drive that only holds files has nothing for the firmware to start.
- The drive’s partition style matches the firmware mode. UEFI starts from GPT disks, and legacy BIOS mode starts from MBR disks. To check, right-click the disk in the lower pane of Disk Management, select Properties, open the Volumes tab and read Partition style.
A USB drive will not start
Try another USB port and recreate the installer with Microsoft’s tool. If the firmware offers both UEFI and legacy entries for it, choose the UEFI one. Secure Boot only lets trusted, digitally signed software run at startup, so it can block some non-Windows tools. Microsoft says that if you turn Secure Boot off to work around a problem, you should turn it back on afterward. On a Surface, also check that Enable Boot from USB devices is switched on in Surface UEFI.
Windows asks for a BitLocker recovery key
This is BitLocker reacting to a boot change. Enter the 48-digit key from your Microsoft account, a printout or a USB drive where you saved it. On a work or school PC, your IT department can give you the key. Microsoft Support cannot retrieve or recreate a lost key, which is why it is worth locating it before you begin.
Windows will not start after the change
First put the original drive back at the top of the boot order. If Windows still fails to load several times in a row, it opens Windows RE automatically. From there you can run Startup Repair, the Windows RE tool Microsoft provides for a PC that does not start or keeps loading. If you changed anything else in firmware setup by mistake, check your PC maker’s support site for how to restore the firmware defaults on your model.
The settings are locked or ask for a password
On a work or school PC the organization may have set a firmware password or locked the boot order. That is a deliberate restriction. Ask your IT department instead of trying to get around it.
Frequently asked questions
Will changing the boot drive delete my files?
No. Changing the boot order only tells the firmware which drive to try first. Files are at risk only when you clone over a drive, format one, or install Windows onto it.
Can I change the boot drive without going into the BIOS?
For a single start, yes. Use a device in Advanced startup lets you pick a drive without opening firmware setup. A permanent change to the order is made in the firmware, though Windows gives you a direct route there through UEFI Firmware Settings, so you do not need to catch a key at startup.
Which key opens the boot menu on my PC?
It depends on the maker. The common ones Microsoft lists are Esc, Delete, F1, F2, F10, F11 and F12. The manufacturer’s support page for your model will confirm it.
Should I pick the drive’s name or Windows Boot Manager?
For a drive with Windows installed in UEFI mode, pick the Windows Boot Manager entry for that drive. For a USB installer or other removable media, pick the entry with the device’s name, using the UEFI version if two are shown.
Can I boot Windows 11 from an MBR disk?
Windows 11 needs UEFI firmware, and UEFI starts from GPT disks, so a Windows 11 boot drive should be GPT. Microsoft’s MBR2GPT tool can convert a system disk from MBR to GPT without deleting data, and the firmware must then be switched to UEFI mode. Back up first, and see Microsoft’s MBR2GPT documentation for the requirements.
Why does my PC go straight to the firmware screen after I changed the order?
The firmware could not find anything to start on the first device and nothing else in the list worked. Check that the entry at the top is a bootable drive, put the original drive back at the top if needed, and save again.
Once the PC starts from the right drive and you have used it for a few days without problems, you can reuse the old drive for storage. Until then, keep it untouched as your fallback.

Matt Jacobs has been working as an IT consultant for small businesses since receiving his Master’s degree in 2003. While he still does some consulting work, his primary focus now is on creating technology support content for SupportYourTech.com.
His work can be found on many websites and focuses on topics such as Microsoft Office, Apple devices, Android devices, Photoshop, and more.