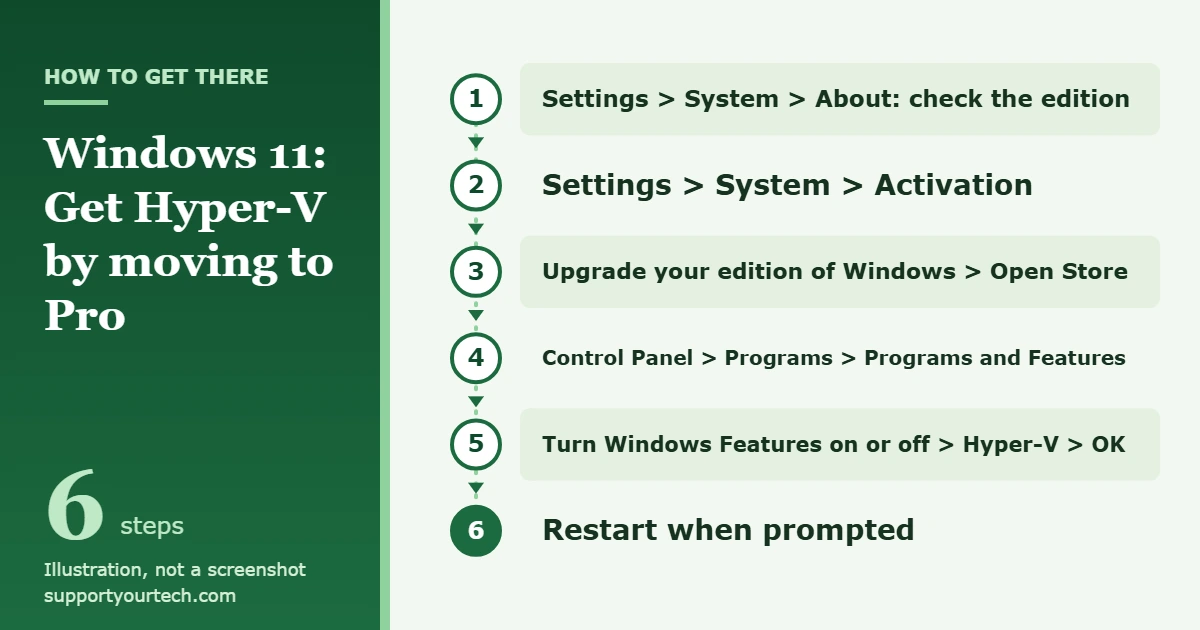
No. Windows 11 Home doesn’t include Hyper-V, and Microsoft says the Hyper-V role can’t be installed on Home. To use Hyper-V, check your edition in Settings > System > About, upgrade to Windows 11 Pro from Settings > System > Activation, and then turn on Hyper-V in Turn Windows Features on or off. If you only need Linux tools, Windows Subsystem for Linux (WSL 2) runs on Windows 11 Home without Hyper-V.
Applies to: Windows 11 Home, Pro, Enterprise and Education. Checked against Microsoft Support and Microsoft Learn on October 7, 2026.
What Windows 11 Home can and can’t do
Hyper-V is Microsoft’s hypervisor, the software layer that lets one PC run several virtual machines (VMs), each with its own operating system. On Windows 11 it is built in as an optional feature, so there is nothing to download. Microsoft lists Hyper-V as part of Windows 11 Pro, Enterprise and Education, and its install guide states plainly that the Hyper-V role can’t be installed on Windows 10 Home or Windows 11 Home.
That leaves Home users with three honest choices:
- Upgrade to Windows 11 Pro and turn on Hyper-V. This is the only Microsoft-documented way to get Hyper-V on a PC that currently runs Home.
- Use WSL 2 if your goal is to run Linux command-line tools or a Linux distribution. Microsoft documents WSL 2 as available on Windows 11 Home.
- Use a third-party virtualization app that its maker supports on Windows 11 Home if you need full virtual machines without upgrading.
Our general guide to enabling Hyper-V in Windows 11 covers the feature itself on supported editions. This article focuses on the Home edition question.
Check which edition of Windows 11 you have
- Select Start, then open Settings.
- Select System, then About.
- Look under Windows specifications. The edition line tells you whether you have Windows 11 Home, Pro, Enterprise or Education.
If it already says Pro, Enterprise or Education, skip the upgrade and go straight to turning on Hyper-V. You can also see the edition at the top of Settings > System > Activation, together with the Activation state, which matters for the upgrade below.
Check that your PC meets the Hyper-V requirements
Before you pay for an upgrade, confirm your hardware can actually run Hyper-V. Microsoft lists these requirements:
- A 64-bit processor with Second Level Address Translation (SLAT), a processor feature that speeds up memory handling for virtual machines.
- CPU support for VM Monitor Mode extensions.
- At least 4 GB of RAM. More is better, because the PC needs enough memory for Windows and every VM you run at the same time.
- Virtualization support turned on in the BIOS or UEFI (Intel VT or AMD-V), plus hardware-enforced Data Execution Prevention (DEP).
To check, open Windows PowerShell or Command Prompt, type systeminfo.exe and press Enter. Scroll to the Hyper-V Requirements section of the report. If every item says Yes, the hardware is ready. If any item says No, fix that first; the usual culprit is virtualization being turned off in the firmware.
To turn it on, go to Settings > System > Recovery, select Restart now next to Advanced startup, then choose Troubleshoot > Advanced options > UEFI Settings and restart. The name and location of the virtualization option depend on your PC maker, so follow its documentation and change only that setting. Microsoft warns that changing other firmware settings might stop Windows from starting. Our guide to enabling virtualization in Windows 11 explains this step in more detail.
Upgrade Windows 11 Home to Pro
Microsoft’s manual upgrade steps apply only to a PC running an activated copy of Windows 11 Home. If Windows isn’t activated, activate Home first.
If you don’t have a Pro product key
- Select Start, then open Settings > System > Activation. Confirm the edition shown at the top is Home and the activation state shows Windows is active.
- Expand Upgrade your edition of Windows.
- Select Open Store next to Upgrade in the Microsoft app. The Microsoft Store opens on the Windows 11 Pro upgrade.
- Follow the Store’s instructions and sign in with your Microsoft account to buy Windows 11 Pro.
- After you confirm the purchase, Windows prompts you to install Windows 11 Pro and restart. Save your work before you accept.
If you already have a Windows 11 Pro product key
- Open Settings > System > Activation.
- Select Change next to Change product key. If User Account Control appears, approve it with an administrator account.
- Enter the 25-character Windows 11 Pro product key and select Next to start the upgrade.
When the PC restarts, check Settings > System > About again. The edition should now read Windows 11 Pro.
Turn on Hyper-V after upgrading
Microsoft documents this route through Control Panel for Windows 11. You need an administrator account.
- Select Start, search for Control Panel and open it.
- Select Programs, then Programs and Features.
- Select Turn Windows Features on or off. The Windows Features list opens.
- Select the Hyper-V check box.
- Select OK. Windows installs the feature.
- Restart your PC when you’re prompted. Hyper-V isn’t ready until the restart finishes.
Alternative: turn on Hyper-V with PowerShell or DISM
These commands do the same thing as the check box and are useful if you prefer typing or are setting up several PCs. They work only on Pro, Enterprise or Education.
PowerShell
- Select Start and type Windows PowerShell.
- Right-click Windows PowerShell and select Run as Administrator. Without administrator rights, the command fails.
- Run Enable-WindowsOptionalFeature -Online -FeatureName Microsoft-Hyper-V -All.
- Enter Y when asked, so the computer restarts and finishes the installation.
DISM
DISM (Deployment Image Servicing and Management) is a built-in Windows tool that can turn features on while Windows is running.
- Open Windows PowerShell with Run as Administrator, as above.
- Run DISM /Online /Enable-Feature /All /FeatureName:Microsoft-Hyper-V.
- Wait for the message “The operation completed successfully.” Restart your PC if Windows asks you to.
Confirm Hyper-V is working, or turn it off again
Select Start, type Hyper-V Manager and open it. If it opens, Hyper-V is installed. To create your first VM, select New and then Virtual Machine in the Actions pane, which starts the New Virtual Machine Wizard. You’ll need installation media, such as an ISO file, for the operating system you want to run inside the VM.
Running systeminfo.exe is another check. Once Hyper-V is running, the Hyper-V Requirements section changes to “A hypervisor has been detected. Features required for Hyper-V will not be displayed.”
To turn Hyper-V off later, return to Turn Windows Features on or off, clear the Hyper-V check box, select OK and restart.
Options that work on Windows 11 Home
Windows Subsystem for Linux (WSL 2)
If you wanted Hyper-V mainly to run Linux, WSL 2 may be all you need. Microsoft says WSL 2 is available on Windows 11 Home. It uses a subset of Hyper-V’s architecture, provided by an optional component called Virtual Machine Platform, which is available on all desktop editions. WSL runs Linux distributions; it doesn’t create general-purpose virtual machines for Windows or other operating systems.
- Right-click Windows PowerShell and select Run as administrator.
- Run wsl –install. This turns on the features WSL needs and installs Ubuntu by default.
- Restart your PC when the command finishes.
- To check which WSL version each distribution uses, run wsl -l -v. New installs use WSL 2 by default.
For a fuller walkthrough, see how to install WSL on Windows 11.
Virtual Machine Platform in Windows Features
Some apps ask you to turn on Virtual Machine Platform directly. Select Start, type Windows features, open Turn Windows features on or off, select Virtual Machine Platform and select OK. Restart if Windows asks you to. Virtual Machine Platform is only a subset of Hyper-V’s architecture, not the full Hyper-V feature.
Third-party virtualization apps
If you need full virtual machines and don’t want to upgrade, use a virtualization app whose maker supports Windows 11 Home and your processor, and download it only from that maker’s site. Our guide to installing VirtualBox on Windows 11 is one example. These apps still need virtualization turned on in your firmware.
Why we don’t recommend Hyper-V “enable” scripts for Home
Many search results suggest a batch file that forces Hyper-V packages onto Windows 11 Home. Microsoft does not document or support that approach; its own guide says the Hyper-V role can’t be installed on Home. Forcing edition-restricted components onto a system can leave Windows in a state Microsoft doesn’t test, can fail or break after updates, and leaves you without a supported fix if something goes wrong. Never run a script from an unknown source with administrator rights. If you need Hyper-V for work, school or development, the Pro upgrade is the dependable route.
Troubleshooting
“Upgrade your edition of Windows” doesn’t appear
Microsoft says that if this section isn’t shown, the device may already be running Pro, or an edition upgrade may not be available for it. Check the edition in Settings > System > About. If Windows isn’t activated, activate Home first, because the manual upgrade steps apply only to an activated copy of Windows 11 Home.
Hyper-V isn’t listed in Windows Features
On Home, this is expected, because the edition doesn’t include it. On Pro, Enterprise or Education, run systeminfo.exe and check the Hyper-V Requirements section. A No next to firmware virtualization means you need to turn it on in UEFI or BIOS settings first.
Hyper-V Manager doesn’t show up after enabling
Make sure you restarted after selecting OK. Then search for Hyper-V Manager from Start again. Microsoft’s guidance is to confirm the Hyper-V feature is installed if Hyper-V Manager is missing, so recheck the Hyper-V box in Windows Features.
PowerShell or DISM commands fail
Run Windows PowerShell with Run as Administrator. Microsoft notes the commands fail without administrator rights. They also fail on Home, because the feature isn’t part of that edition.
Other virtualization apps stop working
Microsoft warns that apps such as VMware Workstation and VirtualBox rely on the same processor features as Hyper-V. When the Hyper-V hypervisor is running, their virtual machines might not start or might run unreliably. Use one virtualization platform at a time, or check that your app’s maker supports running alongside Hyper-V.
Work or school PCs
If your organization manages the PC, edition changes and Windows features may be controlled by your IT department. Ask your administrator before trying to upgrade or turn on Hyper-V.
Frequently asked questions
Is Hyper-V available on Windows 11 Home?
No. Microsoft lists Hyper-V for Windows 11 Pro, Enterprise and Education, and states that the Hyper-V role can’t be installed on Windows 11 Home.
Do I need to download Hyper-V?
No. Hyper-V is built into supported editions of Windows as an optional feature. You turn it on in Windows Features, PowerShell or DISM.
How do I get Windows 11 Pro?
On an activated Home PC, open Settings > System > Activation, expand Upgrade your edition of Windows and select Open Store, or select Change product key if you already have a Pro key.
Can I run WSL 2 on Windows 11 Home?
Yes. Microsoft documents WSL 2 as available on Windows 11 Home. It relies on the Virtual Machine Platform component rather than the full Hyper-V feature.
How much memory do I need for Hyper-V?
Microsoft lists at least 4 GB of RAM. Plan for more if you want to run several VMs at once, since the host and each VM all need memory.
Is it safe to use a batch script to add Hyper-V to Home?
It isn’t a Microsoft-supported method. Microsoft says Hyper-V can’t be installed on Home, so a script that forces it on leaves you with an unsupported setup that could break with updates. Upgrade to Pro or use WSL 2 instead.
Start by checking your edition in Settings > System > About. If you’re on Home and need full VMs, upgrade to Pro and turn on Hyper-V; if you only need Linux, install WSL 2. For the full details, see Microsoft’s guide to installing Hyper-V, its Hyper-V hardware requirements, the steps to upgrade Windows Home to Windows Pro, and the WSL FAQ.
Related: how to upgrade from Windows 11 Home to Pro.

Matt Jacobs has been working as an IT consultant for small businesses since receiving his Master’s degree in 2003. While he still does some consulting work, his primary focus now is on creating technology support content for SupportYourTech.com.
His work can be found on many websites and focuses on topics such as Microsoft Office, Apple devices, Android devices, Photoshop, and more.