Windows 11 has no single button that tests every part of a PC. The fastest reliable check uses three built-in tools in order: the health report in Windows Security > Device performance & health, the device list in Device Manager, and the memory test that opens from Control Panel when you search for Memory and select Diagnose your computer’s memory problems. For anything those tools can’t see, run the diagnostics that your PC maker builds into the computer.
Applies to: Windows 11 desktops, laptops and tablets. Checked against Microsoft Support on October 7, 2026.
Before you start
- Back up your files first. If a drive is producing errors, unusual noises or repeated file corruption, copy important files to another drive or to cloud storage before you run any test. A test can’t bring back data from a drive that fails halfway through.
- Save and close your work. The memory test and some disk checks run during a restart.
- Use an administrator account. Microsoft states that membership in the local Administrators group is the minimum needed to run the disk check command.
- Write down what goes wrong. Note the error message, the stop code on a blue screen, and what you were doing. This tells you which test to run and helps a repair technician later.
- Unplug hardware you added recently. Microsoft’s first suggestion for unexpected restarts is to shut down the PC, remove the new hardware and try again.
Which test should you run?
| Symptom | Start with |
|---|---|
| Blue screens, random restarts, apps closing on their own | Memory test, then Event Viewer |
| A device stopped working (sound, Wi-Fi, webcam, USB) | Device Manager |
| Slow file access, corrupted files, disk error messages | Back up, then chkdsk and the maker’s drive test |
| Laptop battery drains quickly | Windows Security health report, then a battery report |
| Graphics or sound problems in games | DirectX Diagnostic Tool |
| PC won’t start Windows at all | The PC maker’s preboot diagnostics |
How to run hardware diagnostics in Windows 11
Work through these steps in order. Each one takes you further from a quick overview toward a specific part.
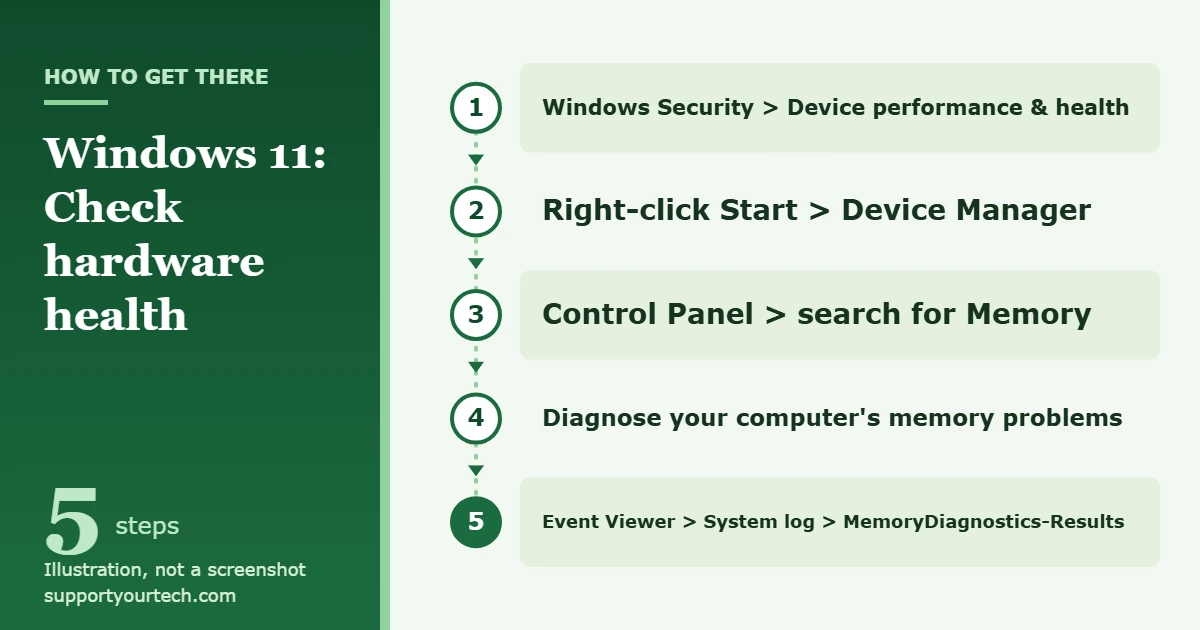
- Open the health report. Search the Start menu for Windows Security, open it, and select Device performance & health. The report covers four areas: Storage capacity, Battery life, Apps and software and Windows Time service. A green check means that area is fine. A yellow mark means there is an issue, and the report shows a recommendation for it.
- Look for device errors. Right-click the Start button and select Device Manager. Look through the list for any device marked with an exclamation point (!). Double-click the device type to expand it if needed.
- Read the error code. Right-click the marked device and select Properties. The Device status area shows a message and a code, such as Code 10 or Code 43. The troubleshooting section below explains the most common codes.
- Start the memory test. Open Control Panel from the Start menu, type Memory in its search box, and select Diagnose your computer’s memory problems. Windows asks when to run the test. It runs outside your normal desktop during a restart, so choose to restart only after your work is saved.
- Read the memory test result. After the test finishes and you sign in again, open Event Viewer from the Start menu and look in the System log for the MemoryDiagnostics-Results entry. It states whether memory errors were found.
Microsoft describes the health report on its Device performance and health page. Keep in mind what it is: a summary of storage space, battery, software and clock issues. It doesn’t stress-test parts, so a clean report doesn’t prove the hardware is healthy.
Check a drive for errors with chkdsk
Chkdsk is the Windows command that checks a drive’s file system. Run it when files are corrupted or Windows reports disk errors, and only after you have a backup.
- Search the Start menu for Command Prompt and open it as an administrator.
- Type chkdsk C: and press Enter. Used without extra parameters, chkdsk only displays the status of the drive and doesn’t fix anything, so this is a safe first look. Replace C: with another drive letter to check a different drive.
- If it reports problems, type chkdsk C: /f /r and press Enter. The /f parameter fixes errors on the disk. The /r parameter locates bad sectors and recovers readable information.
- For the drive Windows is installed on, you will see a message that chkdsk cannot run because the volume is in use, followed by a question about checking it the next time the system restarts. Type Y, press Enter, and restart the PC. The check runs before Windows loads.
Let the check finish. Microsoft says interrupting chkdsk isn’t recommended, although stopping it shouldn’t leave the drive more corrupt than it was before. The full parameter list is in Microsoft’s chkdsk command reference.
Chkdsk repairs the file system and marks bad sectors. It can’t repair a drive that is physically wearing out. If errors keep coming back, Microsoft’s guidance is to contact the drive or PC manufacturer for the diagnostic tools they provide, and you should plan to replace the drive.
Check the battery, graphics and sound
Battery report
On a laptop or tablet, open Command Prompt, type powercfg /batteryreport and press Enter. Windows generates an HTML report of battery usage over the life of the system and saves it in the current folder shown in the Command Prompt window. Our guide on how to check battery health in Windows 11 explains how to read the capacity figures.
DirectX Diagnostic Tool
Type dxdiag in the search box on the taskbar and select dxdiag from the results. The first time, the tool may ask whether to check if your drivers are digitally signed. The System tab lists system information, including the DirectX version. Select Save All Information… to create a file you can send to a support agent or game publisher.
Run your PC maker’s diagnostics
Microsoft’s own troubleshooting documents repeatedly say to run the hardware diagnostics supplied by the system manufacturer. Preboot tests start before Windows loads, so they are also the option to use when Windows won’t start. For a noisy or overheating laptop, many of these tools also include a dedicated laptop fan test.
On a Dell computer, the documented steps are:
- Turn on the computer. At the Dell logo, press F12 several times until the One Time Boot Menu appears.
- Select Diagnostics. A quick test starts on its own.
- To test one part, press Esc during the quick test, select Advanced test, clear the select-all checkbox, pick the parts to test, and select RUN TEST. Checking Thorough mode runs a longer, more complete test.
- If a test fails, write down the error code. Dell error codes begin with 2000-, and Dell publishes reference tables for them.
Dell documents this in its preboot diagnostics article. Other PC makers provide their own diagnostics, opened with a different key or a support app. Look up your exact model on the maker’s support site instead of guessing, because the method varies by brand and model.
How to confirm the result
- Memory: the MemoryDiagnostics-Results entry in the Event Viewer System log reports no errors.
- Devices: the exclamation point is gone in Device Manager and the Device status area no longer shows an error code.
- Drive: a repeat run of chkdsk C: finds no problems.
- Whole PC: the maker’s test finishes without an error code, and the original symptom stops.
A pass isn’t a guarantee. Parts can fail only when hot or only once in a while, and a short test can miss that. If the symptom continues, check the System log in Event Viewer for critical errors logged at the same time as the crash. Our guide to checking event logs in Windows 11 shows how to filter for them.
Troubleshooting
Device Manager shows an error code
Microsoft’s Device Manager error code list gives a fix for each code. The common ones:
- Code 10 (This device cannot start): open the device’s Driver tab and select Update Driver. You may need the latest driver from the hardware maker’s website.
- Code 22 (This device is disabled): select Action, then Enable Device.
- Code 28 (The drivers for this device are not installed): right-click the device, uninstall it, then select Action and Scan for hardware changes to reinstall the driver.
- Code 43 (Windows has stopped this device because it has reported problems): uninstall the device and use Scan for hardware changes in the same way. If the code returns, the part itself may be faulty.
- Code 45 (this hardware device is not connected): nothing to fix. It clears when you plug the device back in.
Device performance & health is missing or won’t open
On a work or school PC, Microsoft notes that policy settings from your organization might prevent access to Device performance & health. Ask your IT department to run the checks. For software-side problems on your own PC, such as sound or printing, see how to run a troubleshooter in Windows 11.
Chkdsk says the volume is in use
That is expected for the Windows drive. Answer Y to schedule the check and restart. If you don’t have administrator rights, chkdsk won’t run at all, so sign in with an administrator account.
Every test passes but the PC still crashes
Follow Microsoft’s basic steps for unexpected restarts: remove recently added hardware, install the latest updates from Settings > Windows Update with Check for updates, and make sure the Windows drive has 10% to 15% of its space free. Then run the maker’s longer test. Faulty or mismatched memory, a failing power supply and motherboard faults are all causes Microsoft lists for hardware-related stop errors, and the last two don’t show up in Windows tools.
Frequently asked questions
Does Windows 11 have a built-in hardware diagnostic tool?
It has several narrow ones instead of one complete test: the Windows Security health report, Device Manager, the memory diagnostic, chkdsk, the battery report and the DirectX Diagnostic Tool. Full component testing comes from the PC maker’s diagnostics.
Where are the Windows Memory Diagnostic results?
In Event Viewer. Open the System log and find the entry named MemoryDiagnostics-Results.
Can running diagnostics damage my PC or delete files?
The read-only checks (the health report, Device Manager, chkdsk C: without parameters, dxdiag and the battery report) change nothing. A chkdsk repair writes to the drive, which is why a backup comes first, especially on a drive that already shows errors.
Should I install a PC health or optimizer app instead?
No. Avoid generic utilities that claim to diagnose and repair all hardware automatically. Stick with Windows tools and the diagnostics from your computer or component maker.
Should I test hardware before reinstalling Windows?
Yes, when the symptoms are crashes, freezes or file corruption. A reinstall doesn’t fix faulty memory or a failing drive, so the problem comes back.
If a test reports a failure, write down the error code, keep your backup current, and contact the PC maker’s support with that code. If the PC is under warranty, do this before opening the case.
Related: How to turn on the keyboard light on an Acer laptop.
Related: How to check fan speed on Windows 11.

Matt Jacobs has been working as an IT consultant for small businesses since receiving his Master’s degree in 2003. While he still does some consulting work, his primary focus now is on creating technology support content for SupportYourTech.com.
His work can be found on many websites and focuses on topics such as Microsoft Office, Apple devices, Android devices, Photoshop, and more.