To change the administrator in Windows 10, sign in with an account that is already an administrator, open Start > Settings > Accounts, open the page that lists the other people on the PC, select the account, choose Change account type, pick Administrator, and select OK. If you want a different person to be the administrator instead of you, promote their account first, confirm it works, and then change your old account to a standard user from the new administrator account.
Applies to: Windows 10 (home and personal PCs). Checked against Microsoft Support and Microsoft Learn documentation on October 7, 2026.
Before you start
Windows has two everyday account types. A standard user can do everyday work such as browsing the web, sending email, and using a word processor. An administrator is a member of the local Administrators group, which Microsoft describes as having full control of the device: including the files, services, and settings that affect everyone, plus creating and managing other accounts. That is why only an existing administrator can make another account an administrator.
- You need an administrator account you can sign in to. If you sign in as a standard user, Windows asks for an administrator’s credentials before it allows any change to account types. The person who owns that administrator account has to type their own password; there is no supported way around this.
- The other account must already exist on this PC. If the person doesn’t have an account yet, add one first (see the section on creating a new administrator below, or our guide on how to make another account on Windows 10).
- Work or school PCs are different. If the computer is managed by an employer or school, its administrator rights are controlled by that organization. Ask your IT department instead of changing accounts yourself.
- Save open work. The person whose account you change should sign out and back in afterward, so have them save anything they’re working on.
How to make an account an administrator in Settings
This is the method Microsoft documents for Windows 10 and Windows 11. It works for both local accounts and accounts that sign in with a Microsoft account.
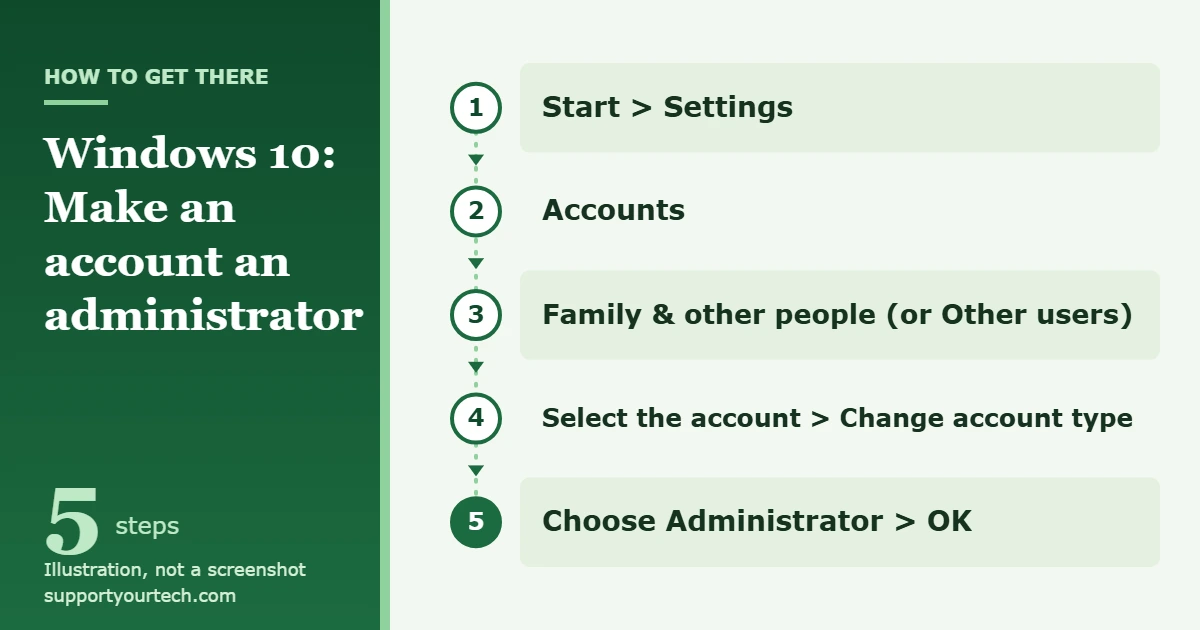
- Sign in with an administrator account. Use the account that already has administrator rights on this PC.
- Open Settings. Select the Start button, then select Settings.
- Go to Accounts. Select Accounts. This area holds every setting for the people who use the PC.
- Open the list of other people on the PC. In the left menu, select the page for other users. Microsoft’s documentation names it Family & other people or Other users; the exact wording depends on your Windows 10 version. This page lists the other accounts on the PC, not the one you’re signed in with.
- Select the account you want to change. Under Other users, select the person’s account so its options appear, then select Change account type. If a User Account Control prompt appears, approve it.
- Choose Administrator. In the dialog that opens, use the dropdown to choose Administrator, then select OK to save the change.
- Have the person sign out and back in. Windows builds a user’s access tokens when they sign in, so the new rights fully apply after their next sign-in.
Microsoft’s own steps are on its page about how to manage user accounts in Windows, under configuring a user as an administrator.
How to switch which account is the administrator
“Changing the administrator” often means handing admin rights to someone else, for example when you give a PC to a family member or set up a separate standard account for yourself. Promoting a new account does not take rights away from the old one, so do it in this order to avoid locking yourself out:
- Promote the new account. Follow the Settings steps above to make the new person’s account an administrator.
- Sign in to the new administrator account. Sign out of your account, then sign in as the new administrator. Open Settings > Accounts and confirm that you can open Change account type for another user without being asked for someone else’s password. That proves the new account has administrator rights.
- Demote the old account. While signed in as the new administrator, open the list of other users, select the old account, choose Change account type, and pick the standard user type. Select OK.
- Remove the old account only if you no longer need it. To delete it entirely, select the old account in the list and use Remove next to Account and data. Microsoft notes that this removes the person’s sign-in information and data from the PC, so back up their files first. It doesn’t delete their Microsoft account itself.
A good rule: never demote or remove the only working administrator until you’ve signed in to another administrator account and confirmed it works.
How to create a new administrator account
If the person who should be the administrator doesn’t have an account yet, create one first and then give it administrator rights.
- Sign in as an administrator and open Settings > Accounts, then open the page for other users.
- Select the button to add another user. Windows asks for the person’s Microsoft account sign-in information.
- Enter their Microsoft account details, or, to create an account that exists only on this PC, select I don’t have this person’s sign-in information and then Add a user without a Microsoft account. Microsoft recommends a Microsoft account, but a local account works too.
- Follow the prompts to finish. The new account appears in the list of other users.
- Select the new account, choose Change account type, pick Administrator, and select OK.
Alternative: use PowerShell
If the Settings page won’t open or you prefer commands, an administrator can add an account to the local Administrators group with Windows PowerShell. The result is the same as choosing Administrator in Settings.
- Select Start, type PowerShell, right-click Windows PowerShell, and choose Run as administrator. Approve the User Account Control prompt.
- To see who is already an administrator, run: Get-LocalGroupMember -Group “Administrators”
- To make a local account an administrator, run the following, replacing UserName with the account’s user name: Add-LocalGroupMember -Group “Administrators” -Member “UserName”
- For an account that signs in with a Microsoft account, Microsoft’s documentation uses the form MicrosoftAccount\[email protected] (with the person’s own email address) as the member name.
- Run Get-LocalGroupMember -Group “Administrators” again. The account should now appear in the list. Have the person sign out and back in.
To take administrator rights away with PowerShell, use Remove-LocalGroupMember -Group “Administrators” -Member “UserName” from an elevated PowerShell window. Double-check the name before you press Enter: removing the wrong account can leave the PC without a working administrator. Microsoft’s reference pages for Add-LocalGroupMember and Remove-LocalGroupMember list every option.
How to confirm the change worked
- Try an admin task. Sign in to the account and start something that needs administrator rights, such as installing an app. An administrator sees a consent prompt that only asks them to approve the action. A standard user sees a credential prompt that asks for an administrator’s user name and password instead.
- Check the Administrators group. From an elevated PowerShell window, run Get-LocalGroupMember -Group “Administrators” and look for the account in the results.
- Undo it if needed. Repeat the Settings steps and choose the standard user type instead of Administrator.
Troubleshooting
Change account type doesn’t appear, or Windows asks for a password
You are probably signed in as a standard user. Sign out and sign in with an administrator account, or ask the person who owns an administrator account to enter their own credentials when Windows asks. If you are trying to change your own account, it won’t be in the list; another administrator has to change it for you.
The account you want isn’t in the list
The list shows only accounts that already exist on this PC, and never the account you’re signed in with. If the person has never signed in on this computer, add their account first using the steps above.
Account options are greyed out or missing on a work or school PC
If the PC is connected to a work or school account (you can see this under Settings > Accounts > Access work or school), the organization may manage who has administrator rights on it, and changing them yourself may not be allowed. Contact your IT department and ask them for the access you need.
The account says Administrator, but apps still ask for permission
That is normal. Even administrators run with standard rights day to day and see a consent prompt when something needs full rights; this is how User Account Control protects the PC. If the prompt asks for a password instead of a simple approval, the person hasn’t signed out and back in since the change, or the change didn’t save. Sign out, sign back in, and check again.
PowerShell says the command isn’t recognized
Make sure you opened Windows PowerShell with Run as administrator. Microsoft notes that the local accounts commands aren’t available in 32-bit PowerShell on a 64-bit system, so use the regular 64-bit Windows PowerShell rather than a 32-bit copy.
Nobody remembers the administrator password
Don’t use password-cracking tools or tricks that promise admin access; they can damage Windows and weaken its security. If it’s your own account, use the supported recovery options in our guide to recovering a Windows 10 administrator password safely. If the account belongs to someone else, ask that person, the PC’s owner, or your IT department.
Frequently asked questions
Can I make myself an administrator without an admin password?
No. Windows only lets a standard user do administrator tasks when someone enters a local administrator’s credentials. Ask the person who has an administrator account to promote your account from their account, or to approve the change for you.
Does changing the account type delete files or apps?
No. Changing the type only changes what the account is allowed to do. Removing an account is different: it deletes that account’s data from the PC.
How many administrator accounts should a PC have?
Microsoft recommends keeping the number of administrators small and using standard accounts for everyday activities like browsing and email. For a home PC, one or two trusted administrator accounts is a sensible setup, so you always have a backup if one stops working.
Can a Microsoft account be an administrator?
Yes. Accounts that sign in with a Microsoft account and local accounts that exist only on the PC can both be administrators, and the Settings steps are the same for each.
Is this the same as the built-in Administrator account?
No. Windows has a built-in account named Administrator, but Windows setup disables it and creates another account that is a member of the Administrators group. Microsoft advises against signing in with that built-in account for daily use. Giving a normal account administrator rights, as shown above, is the supported way to manage a PC.
Are the steps different on Windows 11?
Only slightly. In Windows 11, open Settings > Accounts > Other users, select the account, and choose Change account type next to Account options.
Once the right person has administrator rights, consider setting up a standard account for your own everyday use and keeping the administrator account for installs and system changes.
Related: How to give a user admin rights in Windows 11.

Matt Jacobs has been working as an IT consultant for small businesses since receiving his Master’s degree in 2003. While he still does some consulting work, his primary focus now is on creating technology support content for SupportYourTech.com.
His work can be found on many websites and focuses on topics such as Microsoft Office, Apple devices, Android devices, Photoshop, and more.