For typical Powerpoint presentations that you just show to one person, you likely aren’t concerned with what happens when the slideshow is over.
But some situations call for a slideshow to continue playing for an extended period of time.
This means that you will need to learn how to loop a Powerpoint Office 365 presentation so that it plays continuously.
How to Do a Powerpoint for Office 365 Slideshow Loop
- Open the presentation.
- Select the Slide Show tab.
- Choose Set Up Slide Show.
- Check the Loop continuously until Esc box.
- Click OK.
- Click the top slide, hold down Shift, then click the last slide.
- Choose the Transitions tab.
- Uncheck On Mouse Click, check After, then set a duration for each slide.
Our guide continues below with more information on how to loop a Powerpoint Office 365 presentation, including pictures of these steps.
Sometimes you will create a presentation in Powerpoint that is going to be shown someplace where it will be unattended.
This could be at a trade show, in an office, or anywhere else where there is a TV or computer screen.
Constantly having to restart that slideshow yourself is often impractical, and would be tedious even if you were physically able to attend to it.
Fortunately, it’s possible to create a slideshow loop in Powerpoint so that the presentation will play continuously once it has concluded.
Our guide below will show you how to create a Powerpoint slideshow loop in Microsoft Powerpoint for Office 365.
Documents with pictures often need some adjustments before they look their best. You can find out more with our how to flip an image in Word article.
How to Make a Powerpoint Slideshow Loop (Guide with Pictures)
The steps in this article were performed in the Microsoft Powerpoint for Office 365 version of the application, but will work in most other versions of the application as well.
Note that the presentation can loop on its own, but you may need to adjust any screensaver or hibernation settings on your computer so that the screen will remain on.
Step 1: Open your slideshow in Powerpoint.
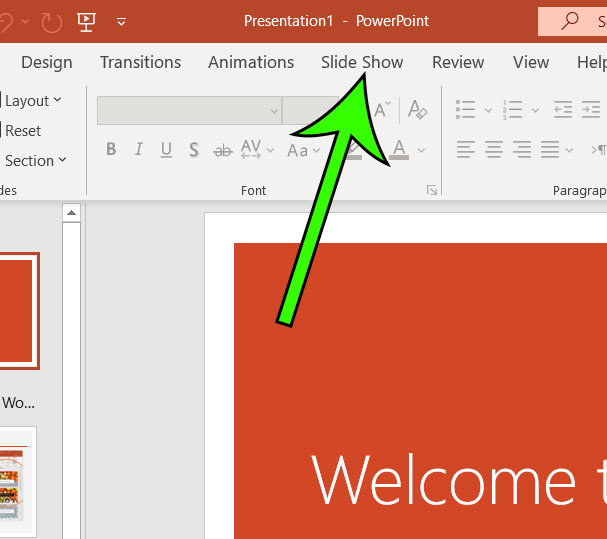
Step 2: Click the Slide Show tab at the top of the window.
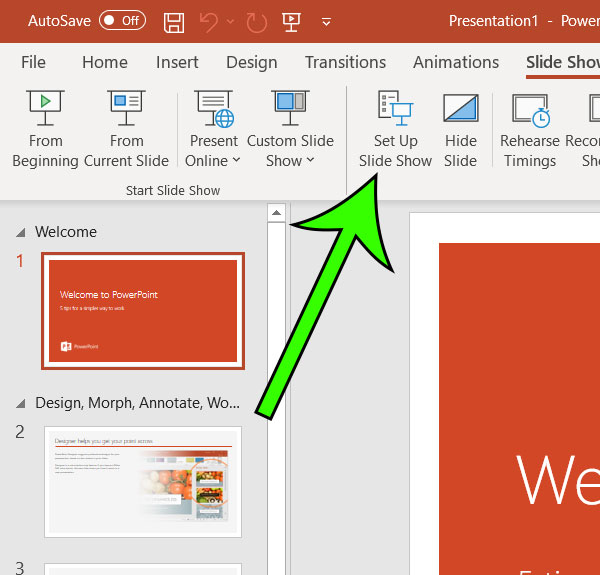
Step 3: Click the Set Up Slide Show button.
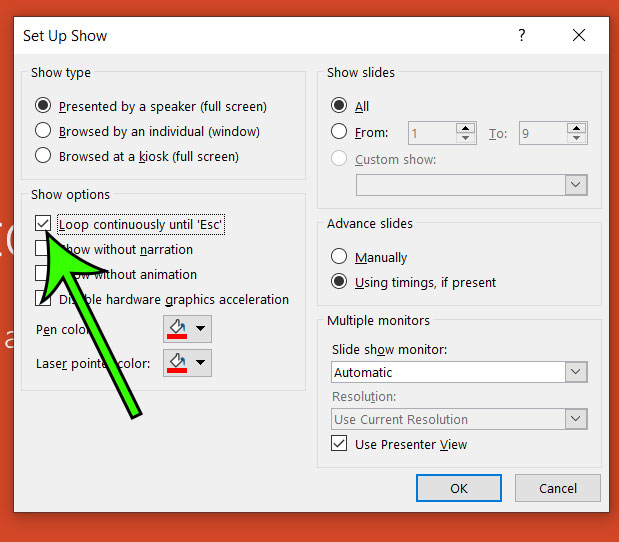
Step 4: Check the box to the left of Loop continuously until Esc, then click OK.
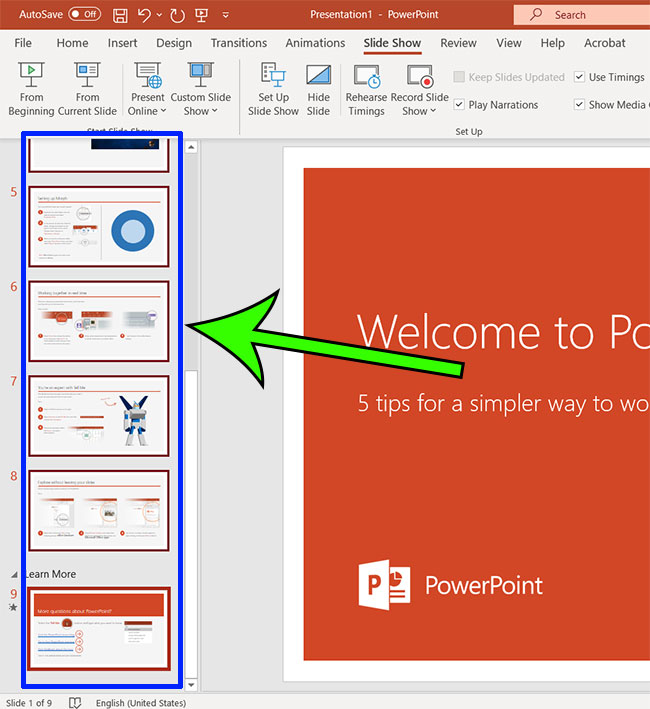
Step 5: Click your first slide in the column at the left side of the window, then hold down the Shift key, scroll down and click the last slide.
Step 6: Select the Transitions tab at the top of the window.
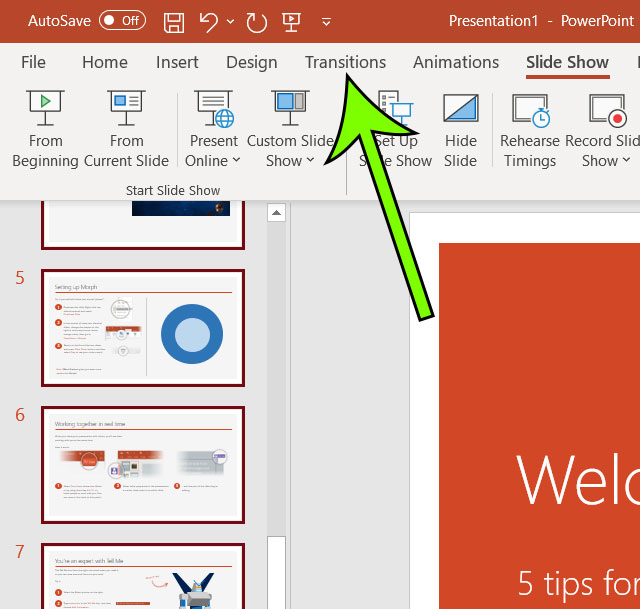
Step 7: Click the box to the left of On Mouse Click to remove the check mark, check the box to the left of After, then choose the amount of time to display each slide.
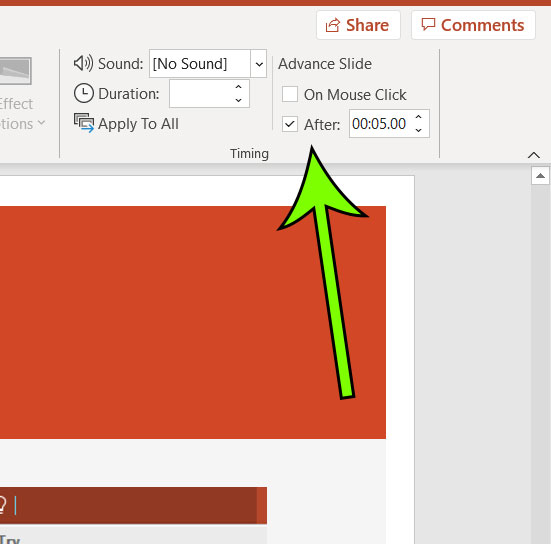
I have set my slideshow to display each slide for 5 seconds in the image above.
You can start your slideshow at any time by pressing the F5 key on your keyboard.
You can stop the slideshow by pressing the Esc key on your keyboard.
You should now know how to loop a Powerpoint Office 365 presentation so that it continuously plays on repeat until you press the Esc key on your keyboard to terminate it.
Find out how to change your slide size in Powerpoint if you need a different orientation or slide dimensions for your presentation.

Matt Jacobs has been working as an IT consultant for small businesses since receiving his Master’s degree in 2003. While he still does some consulting work, his primary focus now is on creating technology support content for SupportYourTech.com.
His work can be found on many websites and focuses on topics such as Microsoft Office, Apple devices, Android devices, Photoshop, and more.