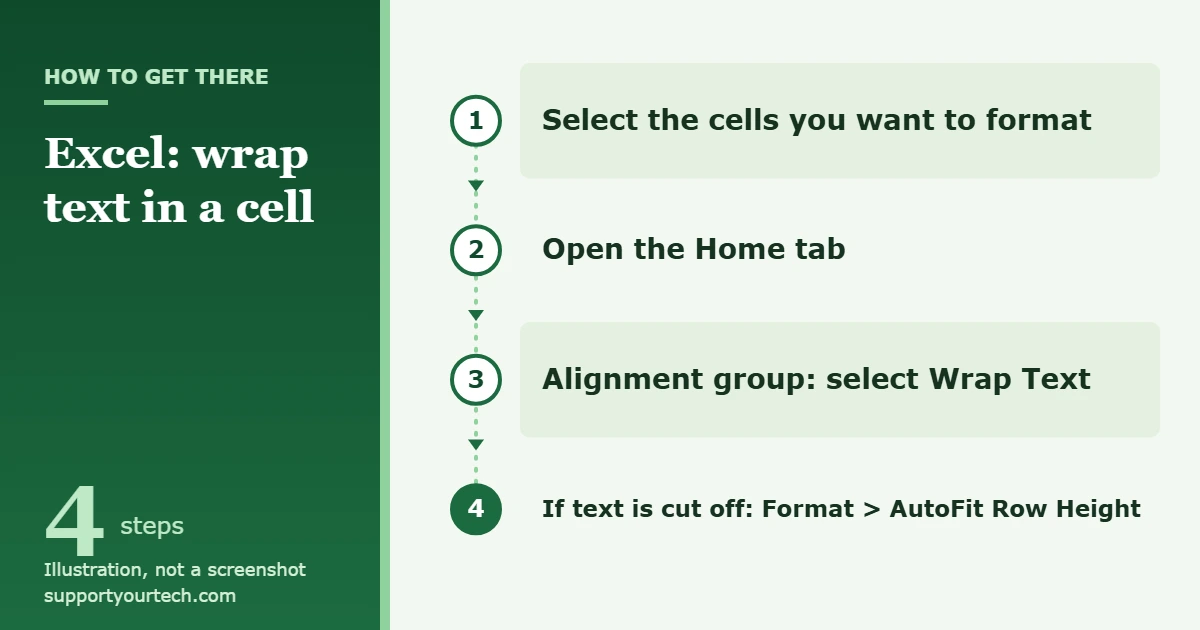
To wrap text in Excel, select the cells you want to format, open the Home tab, and select Wrap Text in the Alignment group. Excel then shows the cell contents on several lines that fit the current column width instead of one long line.
Applies to: Excel for Microsoft 365, Excel 2024, Excel 2021, Excel 2019 and Excel 2016 for Windows, with notes for Excel for Mac and Excel for the web. Checked against Microsoft Support on October 7, 2026.
What Wrap Text does
When you type more text than a column can show, Excel keeps it on a single line. If the next cell is empty the text appears to run across it, and if the next cell has something in it the extra text is hidden. Nothing is lost, but the sheet is hard to read.
Wrap Text is a formatting setting that fixes this without changing what you typed. Microsoft describes two behaviors that are worth knowing before you start:
- The wrap follows the column width. Data in the cell wraps to fit the column, so if you make the column wider or narrower later, the line breaks move on their own.
- The row normally grows to show every line. If some wrapped text is still hidden, the row has usually been set to a specific height, or the text sits in merged cells. Both are covered in the troubleshooting section below.
Because wrapping is formatting, the value in the cell stays the same. Formulas, sorting and searches that use the cell see the same text as before.
This is the method Microsoft documents for the Windows versions of Excel, and it is the quickest for most people.
- Select the cells you want to format. Click one cell, drag across a range, or click a column letter at the top of the sheet to select the whole column. To format the entire worksheet, press Ctrl+A.
- Open the Home tab. It is the first main tab on the ribbon at the top of the Excel window. If you prefer the keyboard, Alt+H opens it.
- Select Wrap Text in the Alignment group. The Alignment group is the block of buttons that also holds the left, center and right alignment controls. The text in the selected cells breaks onto extra lines and the rows get taller to show them.
- Adjust the column width if the result looks cramped. A very narrow column produces a tall stack of short lines. Drag the right edge of the column heading to widen it and the text rewraps to match.
Empty cells can be formatted the same way. If you select a column and turn on Wrap Text before typing, anything long that you enter in those cells later wraps as you go.
Wrap text from the Format Cells dialog box
The Format Cells dialog box has the same setting as a checkbox. It is the better route when you also want to change how the wrapped lines are aligned, because those options sit in the same place.
- Select the cells you want to format.
- Press Ctrl+1 to open the Format Cells dialog box.
- Select the Alignment tab.
- Under Text control, select the Wrap text checkbox.
- Optional: under Text alignment, set Vertical to Top, Center or Bottom to choose where shorter entries sit next to a tall wrapped cell.
- Select OK. The cells wrap exactly as they do with the ribbon button.
The same vertical choices are available on the Home tab as Top Align, Middle Align and Bottom Align. Top alignment is a common choice for tables with one long description column, because every entry in a row then starts on the same line.
The Horizontal list on this tab also has a Justify option. Microsoft describes it as aligning wrapped text to both the left and the right of the cell, and you need more than one line of wrapped text to see any difference.
Start a new line at a specific place
Wrap Text decides where each line ends based on the column width. When you want the break in an exact spot, such as after each line of an address, add a manual line break instead.
- Double-click the cell. You can also select it and press F2. Either way the cell switches to editing and a cursor appears in the text.
- Click the place in the text where the new line should start.
- Press Alt+Enter. The text after the cursor moves to a new line inside the same cell.
- Repeat for any other breaks, then press Enter to finish.
A manual break is part of the cell’s contents, so it stays where you put it when the column width changes. Automatic wrapping can still apply to the same cell: a long line between two manual breaks wraps again if the column is too narrow for it. For more shortcuts and examples, see our guide on how to return in a cell in Excel.
Wrap text in Excel for Mac and Excel for the web
The button has the same name on a Mac, but two of the supporting steps differ.
- Select the cells you want to format.
- On the Home tab, select Wrap Text. The text wraps to fit the column width and adjusts when the width changes.
- If some lines are hidden, open the Format menu, point to Row, and select AutoFit. Microsoft also lists Format > Auto-fit Row Height on the Home tab for the same job.
To add a manual line break on a Mac, double-click the cell, click where the break should go, and press Control+Option+Return. Microsoft’s shortcut list also gives Option+Return. The Format Cells dialog box opens with Command+1, or by right-clicking the selection and choosing Format Cells.
In Excel for the web, Wrap Text is on the Home tab as well, and Alt+Enter starts a new line in the cell you are editing.
Check that it worked, or turn wrapping off
You can tell wrapping is on in three ways: the cell shows more than one line, the row is taller than its neighbors, and the Wrap Text button on the Home tab appears highlighted while the cell is selected. Narrow the column slightly as a test. If the lines rearrange themselves, the cell is wrapping automatically.
To undo the change straight away, press Ctrl+Z. To remove wrapping later, select the cells and select Wrap Text again, or press Ctrl+1 and clear the Wrap text checkbox on the Alignment tab. The text returns to one line.
Manual line breaks are different because they are characters in the text, not formatting. To remove one, double-click the cell, click at the start of the line that follows the break, and press Backspace.
Fix wrapped text that is cut off or not wrapping
The row is set to a specific height
This is the first cause Microsoft lists. If someone dragged the row to a size or typed a height for it, the row stops growing to fit new lines. To hand control back to Excel:
- Select the cell or range with the hidden text.
- On the Home tab, in the Cells group, select Format.
- Under Cell Size, select AutoFit Row Height.
A faster way is to double-click the boundary below the row heading, which is the line under the row number at the left edge of the sheet. To fix every row at once, choose Select All and then double-click the boundary below any row heading. If you would rather pick the size yourself, choose Row Height in the same Format menu and type a number in the Row height box, or drag the bottom border of the row until all the lines show.
One limit applies here. Microsoft lists the maximum row height as 409, so a cell holding a very large block of text cannot always show all of it at once, however the row is fitted. Widening the column so that fewer lines are needed is the practical answer.
The cells are merged
Microsoft’s second listed cause is text in a range of cells that has been merged. In that layout, set the row height yourself by dragging the bottom border of the row, or unmerge the cells: select the merged cell, select the Merge & Center down arrow on the Home tab, and select Unmerge Cells. The data moves to the left cell when the cells split, and wrapping and row fitting work normally again. Our guide on merging two cells in Excel explains what merging does to a range.
The text repeats or does not line up as expected
Check the horizontal alignment. Press Ctrl+1, open the Alignment tab, and look at the Horizontal box. The Fill setting repeats the contents of the cell until the cell is full, which is not what you want for wrapped sentences. Change it to General, the default, which aligns text to the left and numbers to the right, and select OK.
Nothing seems to happen when you select Wrap Text
If the column is already wide enough to show the whole entry on one line, there is nothing to wrap. The setting is still applied and will take effect as soon as the text gets longer or the column gets narrower. Long entries without spaces, such as web addresses, can also wrap at awkward points because there is no natural place to break them. Widen the column or add a manual line break where you want the split.
Wrap Text is unavailable
If you cannot change formatting at all, the worksheet may be protected or the workbook may have been shared with you as view-only. In a file from work or school, ask the owner for edit access or for the sheet to be unprotected.
Wrap Text, Shrink to fit, or a wider column?
Wrapping is one of three ways to make long entries visible, and each suits a different sheet.
| Option | What it does | Best for |
|---|---|---|
| Wrap Text | Shows the entry on several lines and makes the row taller | Notes, descriptions, addresses and long column headings |
| Shrink to fit | Reduces the displayed size of the text until it fits the cell; the applied font size is not changed | Entries that are only slightly too long, where row height must stay the same |
| Wider column | Keeps everything on one line at full size | Short text and numbers, when there is room on the page |
Shrink to fit is a checkbox next to Wrap text on the Alignment tab of the Format Cells dialog box. Use it with care on long text, because the result can become too small to read. To let Excel size cells for you, see our guide on making Excel cells expand to fit text automatically.
Frequently asked questions
Is there a keyboard shortcut for Wrap Text in Excel?
Microsoft’s shortcut list does not include a single key combination for Wrap Text. On Windows you can press Alt+H to open the Home tab; Excel then displays a letter beside each command, and pressing the letter shown on Wrap Text applies it. Ctrl+1 followed by the Alignment tab is the other keyboard route.
How do I wrap text in a whole column or the whole sheet?
Click the column letter to select the column, or press Ctrl+A to select the worksheet, and then select Wrap Text on the Home tab. Every selected cell gets the setting, including empty ones, so new entries wrap too.
Why is my wrapped text cut off at the bottom?
The row has a fixed height or the cell is merged. Select the row and choose Home > Format > AutoFit Row Height, or double-click the boundary below the row heading. For merged cells, drag the row taller by hand.
Does wrapping text change my data?
No. Wrap Text changes only how the cell is displayed. A manual line break added with Alt+Enter is different: it is stored in the cell as part of the text.
What is the difference between Wrap Text and Alt+Enter?
Wrap Text breaks lines automatically wherever the column width requires, and the breaks move when the width changes. Alt+Enter puts a break at one exact position that stays put. Many sheets use both: manual breaks for structure, wrapping for everything else.
Can I wrap text and rotate it in the same cell?
Both settings are on the Alignment tab of the Format Cells dialog box, so they can be combined, although rotated text often needs the row height or column width adjusted by hand. See how to rotate text in Excel for the orientation options.
Microsoft references and next step
The steps above follow Microsoft’s own instructions: Wrap text in a cell in Excel, Change the column width and row height, Wrap text in a cell in Excel for Mac and Keyboard shortcuts in Excel.
Once your text wraps the way you want, select the rows and run AutoFit Row Height one last time so that nothing is hidden before you print or share the workbook.
Related: how to press Enter in Excel and stay in the same cell.

Matt Jacobs has been working as an IT consultant for small businesses since receiving his Master’s degree in 2003. While he still does some consulting work, his primary focus now is on creating technology support content for SupportYourTech.com.
His work can be found on many websites and focuses on topics such as Microsoft Office, Apple devices, Android devices, Photoshop, and more.