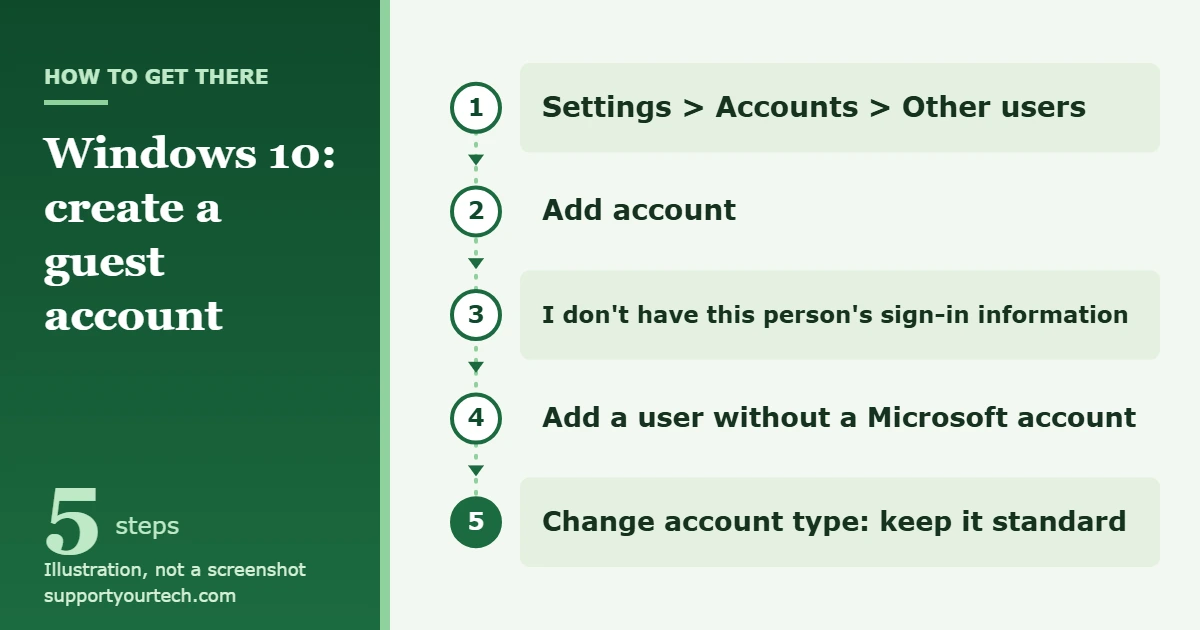
Windows 10 has no Guest option in Settings, so the reliable way to give a visitor their own sign-in is to create a standard local account: open Settings > Accounts > Other users, select Add account, then choose I don’t have this person’s sign-in information and Add a user without a Microsoft account. Name it something like Visitor, and remove it when the visit is over.
Applies to: Windows 10 (Home and Pro). Checked against Microsoft Support on October 7, 2026.
What a “guest account” means on Windows 10
Windows 10 still contains a built-in account named Guest, but Microsoft’s documentation says it is disabled by default with a blank password, calls it a security risk because it can provide anonymous access, and recommends leaving it disabled unless it is really needed. There is no switch for it in the Settings app.
What most people want from a guest account is simpler: a separate sign-in for a friend, relative or house sitter, so they are not using your desktop, your browser and your saved passwords. A standard local account does that job. “Local” means the account exists only on this PC and is not tied to anyone’s Microsoft account or email address. “Standard” means it is not an administrator, so anything that needs administrator rights stops and asks for an administrator’s approval first.
| Option | Best for | Keep in mind |
|---|---|---|
| Standard local account (Settings) | Home PCs with occasional visitors | Microsoft’s documented route; you delete the account yourself afterward |
| Local account placed in the Guests group (Command Prompt) | People comfortable typing commands | Same idea, done with net user and net localgroup |
| Kiosk (Assigned Access) | A PC that should run one app only | Needs Windows 10 Pro, Enterprise or Education |
| Shared PC mode | Schools and organizations | Set up with management tools, not from Settings |
| Built-in Guest account | Not recommended | Disabled by default; Microsoft advises leaving it that way |
Before you start
- Sign in with an administrator account. Only an administrator can add, change or remove other accounts.
- Pick a name other than Guest. That name already belongs to the built-in account, so use something like Visitor or Guest1.
- Make sure your own account has a password or PIN. A separate guest account protects very little if anyone can still open yours.
- Windows 10 reached end of support on October 14, 2025. A PC that is not enrolled in Microsoft’s Extended Security Updates program no longer gets security fixes, which matters more when other people browse the web on it.
Create a guest account in Windows 10 Settings
- Open Settings from the Start menu and select Accounts.
- Select Other users. If your Windows 10 screen words this section a little differently, choose the one that lists other people who can use this PC.
- Under Add other user, select Add account. A Microsoft account window opens and asks for the person’s email address. Do not enter one.
- Select I don’t have this person’s sign-in information. Windows moves to a page that offers to create a new Microsoft account.
- Select Add a user without a Microsoft account. This is the choice that creates a local account instead.
- Type a user name such as Visitor and a password, fill in any other fields Windows asks for, and finish the form. The new account now appears in the list of other users.
- Select the new account in the list, then select Change account type. Check that the account type is the standard one, not administrator, and select OK.
The site’s guide to creating a local account on Windows 10 covers the same form in more detail, including naming rules and PowerShell. Microsoft’s own steps are on its Manage user accounts in Windows page.
Create a guest account with Command Prompt
The same result is possible with two built-in commands. This method also lets you move the account out of the regular Users group and into the Guests group, which is the group Windows provides for occasional or one-time users. Microsoft describes members of Users and Guests as having similar access by default, so treat this as tidy labeling more than a tighter lock.
- Search for Command Prompt, right-click it and choose Run as administrator. Approve the prompt. A Command Prompt window opens with administrator rights.
- Type net user Visitor /add /active:yes and press Enter. This creates an enabled local account named Visitor. Replace Visitor with another name if you prefer, up to 20 characters.
- Type net user Visitor * and press Enter. Windows prompts you for a password. The characters do not appear on screen while you type.
- Type net localgroup Users Visitor /delete and press Enter. This takes the account out of the Users group.
- Type net localgroup Guests Visitor /add and press Enter. This adds the account to the Guests group.
If you only want a standard account and do not care about the Guests group, stop after step 3.
Limit when the account can be used
The net user command has two options that Settings does not offer, and both are useful for visitors:
- net user Visitor /expires:10/31/2026 makes the account expire at the start of that date. Use /expires:never to clear it. The date order (month first or day first) follows your region.
- net user Visitor /times:M-F,8AM-5PM allows sign-in only on those days and hours. Times must be in one-hour steps. Use /times:all to remove the limit.
Microsoft documents every option on its net user command reference.
Check that the guest account works
- Save your work, then sign out or switch users. If you have not done this before, see how to switch users in Windows 10.
- Choose the new account on the sign-in screen and enter its password. You should arrive at a clean desktop with none of your files or browser history.
- Try something that needs administrator rights, such as installing a program. Windows should stop and ask for an administrator’s approval. That confirms the account is a standard one.
From an administrator Command Prompt you can also type net user to list every account on the PC, net user Visitor to see the details of that one account, or net localgroup Guests to list the members of the Guests group.
Remove or turn off the guest account afterward
A guest account that stays on the PC for months collects files and browsing data from each visitor. You have two ways to deal with that.
Remove it completely. Go to Settings > Accounts > Other users, select the account, and next to Account and data select Remove. Microsoft notes that this removes the person’s sign-in information and data from the device, so copy anything the visitor wants to keep first. Creating a fresh account for the next visitor takes a couple of minutes and gives them a clean start.
Turn it off but keep it. In an administrator Command Prompt, type net user Visitor /active:no. The account and its files stay on the PC, but nobody can sign in with it. Type net user Visitor /active:yes before the next visit. To delete the account from the command line instead, type net user Visitor /delete.
When a standard account is not locked down enough
A standard account is a separate space, not a cage. A visitor can still browse the web, run the apps that are installed for everyone and save files in their own folders. If you need more control, Windows has two features built for it.
- Kiosk (Assigned Access). This runs a single app or Microsoft Edge in full screen, and restarts the app if it is closed. It suits a reception desk or a PC that should only show a web page. Microsoft lists it as supported on Windows 10 Pro, Enterprise and Education, not Home. See Microsoft’s Assigned Access overview.
- Shared PC mode. This can put a Guest button on the sign-in screen that creates a new local account each time it is used and deletes it at sign-out. It is aimed at schools and organizations and is configured through Microsoft Intune, a provisioning package or a PowerShell script.
Why not just enable the built-in Guest account?
Older tutorials suggest switching on the built-in Guest account. Microsoft’s guidance points the other way. The security policy that controls it, Accounts: Guest account status, is set to Disabled by default on client PCs, and Microsoft’s best practice is to keep it there. Its documentation explains that an enabled Guest account lets unauthenticated network users sign in as Guest with no password and reach any shared folder that allows the Guest account, the Guests group or the Everyone group.
A named account that you create, protect with a password and delete afterward avoids that problem, which is why the methods above are the better choice on a home PC.
Troubleshooting
There is no option to add an account, or it is unavailable
You are probably signed in with a standard account. Sign in with an administrator account and try again. On a PC that belongs to an employer or school, account creation may be restricted by the organization, and the IT help desk is the place to ask.
Windows keeps asking for an email address
That is the Microsoft account path. Do not type an address. Select I don’t have this person’s sign-in information first, then Add a user without a Microsoft account on the next page.
Windows will not accept “Guest” as the name
The built-in account already uses that name even though it is disabled. Choose a different name such as Visitor.
A net command reports that access is denied
The Command Prompt window was not opened with Run as administrator. Close it, open it again that way and repeat the command.
The password or name is rejected
With net user, a user name can be up to 20 characters and a password up to 127 characters, and the password must meet the minimum length set on the PC. Try a shorter name or a longer password.
The guest is asked for an administrator password
That is the account working as intended. Installing software and changing system-wide settings need administrator approval. Enter your own credentials only if you are happy for the change to be made.
The guest cannot sign in at certain times or after a certain date
Check whether you set /times or /expires on the account. Run net user Visitor to see the current values, then reset them with /times:all or /expires:never.
Frequently asked questions
Does Windows 10 have a guest account?
It has a built-in account named Guest that is disabled by default, and there is no setting for it in the Settings app. For a visitor, create a standard local account instead.
Can I do this on Windows 10 Home?
Yes. The Settings method and the net user commands do not depend on the Pro edition. Only the kiosk feature needs Pro, Enterprise or Education.
Can a guest see my files?
The guest gets their own desktop, folders and browser data, separate from yours, and cannot make changes that need administrator rights. Files you keep in shared locations or on other drives may still be reachable, so move anything private into your own user folders before handing over the PC.
Does the guest need a Microsoft account?
No. The Add a user without a Microsoft account choice creates a local account that works without any email address. Microsoft recommends Microsoft accounts for regular users, but a local account is a sensible fit for a short visit.
Is the guest’s data erased when they sign out?
Not with a standard local account. The files stay until you remove the account. Automatic deletion at sign-out is a feature of Shared PC mode.
How do I delete the guest account?
Open Settings > Accounts > Other users, select the account and choose Remove, or run net user Visitor /delete in an administrator Command Prompt.
Once the account exists, sign in to it once yourself to confirm it opens to a clean desktop, then hand the PC over and remove the account when your visitor leaves.
Related: add a guest account on Windows 11.

Matt Jacobs has been working as an IT consultant for small businesses since receiving his Master’s degree in 2003. While he still does some consulting work, his primary focus now is on creating technology support content for SupportYourTech.com.
His work can be found on many websites and focuses on topics such as Microsoft Office, Apple devices, Android devices, Photoshop, and more.