To add OneDrive to File Explorer in Windows 11, open the OneDrive app from Start and select Sign in with your Microsoft account, then finish the short setup. Once you’re signed in, File Explorer lists your files under OneDrive – Personal (or OneDrive – [CompanyName] for a work or school account). There is no separate “add” button in File Explorer: the entry appears when the OneDrive app is installed, running and signed in.
Applies to: Windows 11 with the Microsoft OneDrive desktop app, personal and work or school accounts. Checked against Microsoft Support on October 7, 2026.
Before you start
- A Microsoft account. You need a personal Microsoft account or a work or school account from your organization.
- The OneDrive desktop app. Microsoft says OneDrive is already installed on Windows 11 PCs. If it was removed, you can download it again (see the troubleshooting section below).
- An internet connection for signing in and for the first sync.
Two apps share the OneDrive name. Microsoft OneDrive is the backup and sync app that creates the File Explorer entry. OneDrive by Microsoft Corporation is a Microsoft Store app for viewing files, and Microsoft notes that it does not back up or sync your files, so it will not add anything to File Explorer.
Add OneDrive to File Explorer by signing in
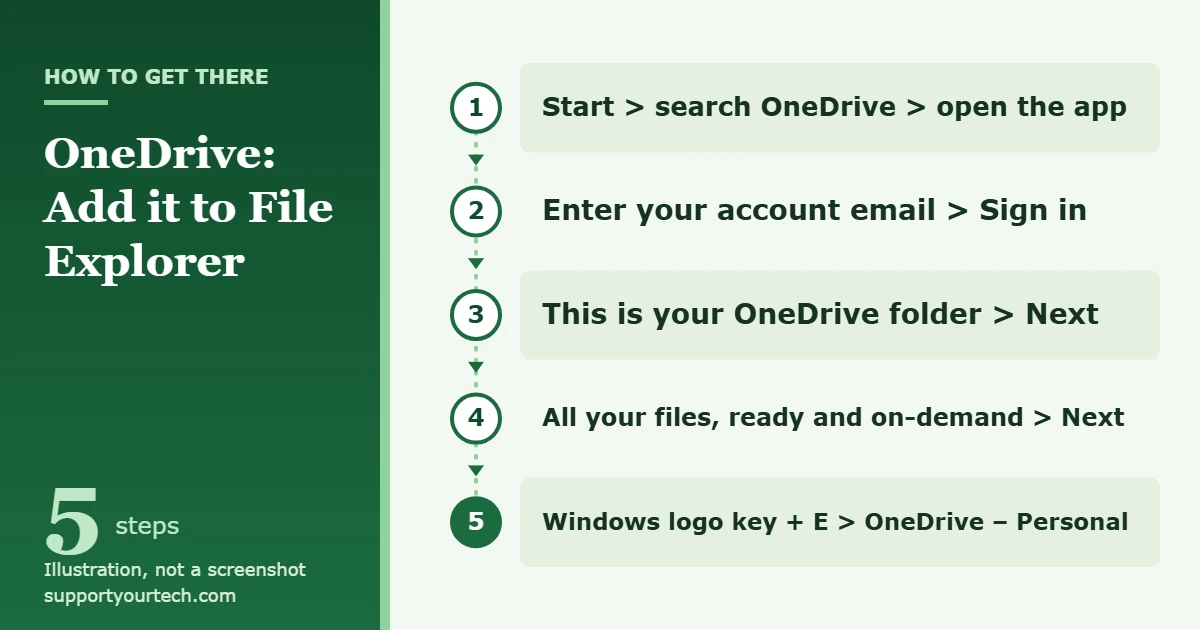
- Open OneDrive. Select Start, type OneDrive, and select the OneDrive app in the results. If you see a sign-in screen, OneDrive is not set up yet on this PC.
- Sign in. When prompted, enter the email address for your personal Microsoft account or your work or school account and select Sign in. Then enter your password or confirm the sign-in the way your account requires.
- Accept or change the folder location. On the This is your OneDrive folder screen, select Next to keep the default location. If you want your OneDrive files on a different drive, select Change location now. Microsoft says this is the best time to make that change.
- Review Files On-Demand. The All your files, ready and on-demand screen explains how files are marked as online-only, locally available or always available. Select Next.
- Finish the remaining setup screens. Follow any further prompts until setup closes. OneDrive then starts syncing, and the cloud icon appears on the taskbar.
- Open File Explorer. Press the Windows logo key + E, or select File Explorer on the taskbar or in Start. Look in the left pane for OneDrive – Personal or OneDrive – [CompanyName]. Selecting it shows your OneDrive files and folders.
For more detail on the sign-in screens, including two-step verification and account conflicts, see our guide on how to sign in to OneDrive on Windows 11. Microsoft’s own walkthrough is Sync your computer’s files and folders with OneDrive.
How to tell OneDrive is working
- The cloud icon is on the taskbar. After setup, the OneDrive cloud icon appears in the notification area at the right end of the taskbar. A white cloud is a personal account; a blue cloud is a work or school account.
- The File Explorer entry opens your files. Selecting OneDrive – Personal shows your OneDrive files and folders, the same ones you see at OneDrive.com.
- Files show status icons. A blue cloud means a file is online-only. A green check means it has been downloaded and is locally available. A solid green circle means it is set to Always keep on this device.
If the cloud icon isn’t visible, it may be in the overflow area of the taskbar. Select the up arrow next to the notification area to see hidden icons, and drag the OneDrive icon onto the taskbar if you want it always visible. You can also right-click the taskbar, open taskbar settings and use the Other system tray icons section to choose which icons can appear.
Pin OneDrive to Quick access
The OneDrive entry sits in the left pane on its own, but you can also pin it, or any OneDrive folder you use often, to Quick access so it is one click away:
- Open File Explorer and select OneDrive – Personal (or your work or school entry) in the left pane.
- Right-click the OneDrive folder you want, or press and hold it on a touch screen.
- Select Pin to Quick access. The folder now appears in the Quick access list.
Add a second OneDrive account to File Explorer
Each signed-in account gets its own entry in File Explorer. Personal files appear under OneDrive – Personal, and work or school files appear under OneDrive – [CompanyName]. You can have one personal account and several work or school accounts on the same PC.
- Select the OneDrive cloud icon in the notification area.
- Select the OneDrive Help and Settings icon, then select Settings.
- Go to the Account tab and select Add an account.
- Sign in with the other account and complete the setup screens. A second OneDrive entry appears in File Explorer when setup finishes.
If OneDrive is missing from File Explorer
Work through these checks in order. Most missing entries come from OneDrive not running or not being signed in.
The OneDrive icon is grey with a line through it
Microsoft explains that a grayed-out OneDrive icon with a line through it means you are not signed in or setup has not finished. Select the icon, sign in, and complete the setup steps above. The File Explorer entry appears after setup is complete.
There is no OneDrive icon at all
If you can’t find the cloud icon, even among hidden icons, OneDrive is probably not running. Select Start, search for OneDrive, and open the app. To have it start every time you sign in to Windows, go to Start > Settings > Apps > Startup and set the toggle for OneDrive to On. You can also right-click Start, open Task Manager, go to the Startup apps tab, select OneDrive and choose Enable.
OneDrive is not installed
If searching Start doesn’t find the OneDrive app, it was uninstalled. Download the Microsoft OneDrive app from Microsoft’s OneDrive download page, run the downloaded file, follow the prompts and sign in. Make sure you install the sync app rather than the Store viewing app. Our guide to reinstalling OneDrive on Windows 11 covers this in more detail. Uninstalling and reinstalling the app does not delete the files stored in your OneDrive; you can still reach them at OneDrive.com.
OneDrive was hidden from File Explorer
Microsoft documents a way to hide OneDrive by turning on the Hidden attribute of the OneDrive folder. If you or someone else did this, reverse it:
- Open File Explorer, select View > Show, and then select Hidden items.
- Go to the folder where OneDrive stores your files (the location chosen during setup).
- Right-click the OneDrive folder and select Properties.
- On the General tab, next to Attributes, clear the Hidden check box and select OK.
- Start OneDrive from Start if you had quit it.
OneDrive is running but the entry still won’t appear
Resetting OneDrive clears its settings and reconnects your accounts. Microsoft says you won’t lose files or data by resetting, but it does trigger a full sync, and if you chose to sync only some folders you’ll need to choose them again.
- Press the Windows logo key + R to open Run.
- Paste %localappdata%\Microsoft\OneDrive\onedrive.exe /reset and select OK.
- If you see a “Windows cannot find…” message, try C:\Program Files\Microsoft OneDrive\onedrive.exe /reset instead, and if that also fails, C:\Program Files (x86)\Microsoft OneDrive\onedrive.exe /reset.
- Open Start, search for OneDrive, and open the app to start it again. Sign in if asked.
If none of the three commands works, the OneDrive sync app isn’t installed; reinstall it as described above. Microsoft’s full instructions are on its Reset OneDrive page.
Work or school PCs
On a PC managed by an employer or school, an administrator can use Group Policy to stop OneDrive from starting. Microsoft lists the symptoms: you are never prompted to sign in, and nothing syncs, with no error message. The setting involved is called DisableFileSyncNGSC. Changing it yourself doesn’t stick, because the policy can reapply it, so ask your IT team to change the policy rather than editing the registry.
Files show a red circle with a white cross
This icon means a file or folder can’t be synced. OneDrive is still in File Explorer, but that item has a problem. Select the OneDrive cloud icon to see the error details. If you see a paused icon instead, select the icon, then More, then Resume syncing.
How Files On-Demand affects what you see
Files On-Demand lets you browse everything in your OneDrive from File Explorer without downloading it all. Online-only files appear in File Explorer but don’t take up space on your PC until you open them. To manage space yourself, right-click a file or folder in the OneDrive entry and choose Always keep on this device to keep a full copy for offline use, or Free up space to make it online-only again.
Files On-Demand is on by default in current versions of OneDrive. You can check it in OneDrive settings: select the cloud icon, then Help and Settings > Settings, go to the Sync and back up tab and expand Advanced settings. See Microsoft’s Files On-Demand guide for details.
How to remove OneDrive from File Explorer
If you want the entry gone, you have two options. Neither deletes the files stored in your OneDrive online.
- Unlink the account. Select the OneDrive cloud icon, select Help and Settings > Settings, go to the Account tab, select Unlink this PC, and then select Unlink account. Syncing stops for that account, and you can sign in again later to bring the entry back.
- Hide the folder. In File Explorer, right-click OneDrive, select Properties, and on the General tab check Hidden next to Attributes. Then select Help and Settings > Quit OneDrive from the cloud icon.
Microsoft describes both on its Turn off, disable, or uninstall OneDrive page.
Frequently asked questions
Why isn’t OneDrive showing in File Explorer?
The entry only appears when the OneDrive sync app is installed, running and signed in. Check the cloud icon on the taskbar: a grey icon with a line through it means you need to sign in, and no icon at all means OneDrive isn’t running or isn’t installed.
Do I need to edit the registry to add OneDrive to File Explorer?
No. Signing in to the OneDrive app creates the File Explorer entry. Registry changes are only relevant on managed PCs, where your IT administrator controls OneDrive through policy.
Can I add OneDrive to File Explorer without downloading all my files?
Yes. With Files On-Demand, all your files appear in File Explorer as online-only and only download when you open them or choose Always keep on this device.
Can I have two OneDrive accounts in File Explorer?
Yes, with one personal account and one or more work or school accounts. Each appears as its own entry. You can’t add a second personal account.
Will removing OneDrive from File Explorer delete my files?
No. Unlinking, hiding or uninstalling OneDrive doesn’t delete files stored in your OneDrive. You can always reach them by signing in at OneDrive.com.
I installed OneDrive from the Microsoft Store and nothing appeared. Why?
The Store app named OneDrive by Microsoft Corporation is for viewing files and doesn’t sync them, so it doesn’t add a File Explorer entry. Install the Microsoft OneDrive sync app from Microsoft’s download page instead.
Once OneDrive is in File Explorer, save or move files into it to keep them synced across your devices. If OneDrive isn’t starting at all, see our guide on turning on OneDrive in Windows 11.
Related: How to use OneDrive on Windows 11.
Related: How to add another OneDrive account on Windows 11.

Matt Jacobs has been working as an IT consultant for small businesses since receiving his Master’s degree in 2003. While he still does some consulting work, his primary focus now is on creating technology support content for SupportYourTech.com.
His work can be found on many websites and focuses on topics such as Microsoft Office, Apple devices, Android devices, Photoshop, and more.