Many of the apps and services you use on your iPhone 13 will require a monthly or yearly subscription.
Because of the prevalence of this type of payment system, it’s easy to lose track of your active subscriptions.
Fortunately, you can find this information on your device in just a few steps and cancel any existing subscriptions you no longer want.
On your iPhone, you can delete subscriptions by going to Settings, selecting your Apple ID card, Subscriptions, and then tapping on the one you want to delete. Then, tap the Cancel Subscription button, followed by Confirm.
Canceling an iPhone Subscription
- Select Settings.
- Choose your name.
- Touch Subscriptions.
- Select a subscription.
- Select Cancel Subscription.
- Choose Confirm.
Our guide continues below with more information, including screenshots, on how to delete subscriptions on iPhone 13.
If you listen to music or watch movies on your iPhone, you may be doing so through a subscription.
You may also have subscriptions for fitness apps, games, or cloud storage services in addition to these options.
It can be difficult to keep track of everything if you have so many different reasons for paying for a subscription on your iPhone.
Fortunately, there is a tab in the Settings app that lists all of your presently active and inactive subscriptions.
If you find something there that you no longer want or need, you can cancel it directly from your iPhone by following the steps below.
Related: Find out how to turn off the Emergency SOS option on your device if you keep accidentally using it.
How to See and Cancel Your iOS Subscriptions
The methods in this post were carried out on an iPhone 13 running iOS 16.
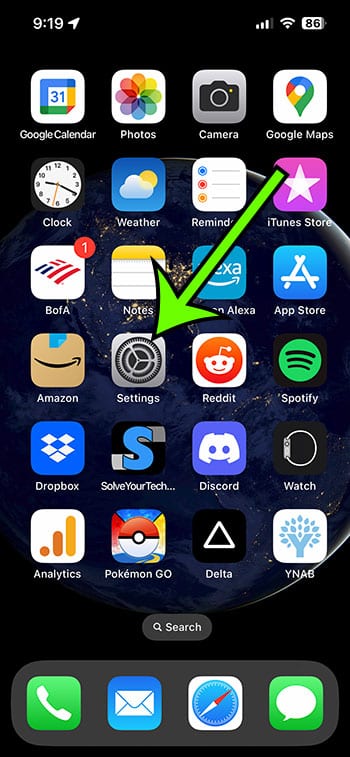
Step 1: Launch the iPhone Settings app.
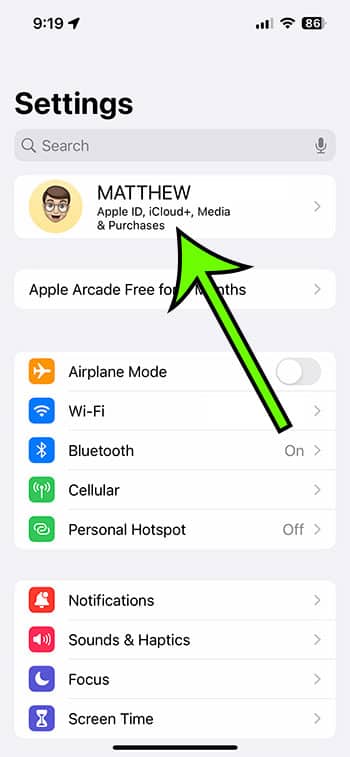
Step 2: At the top of the menu, click on your name.
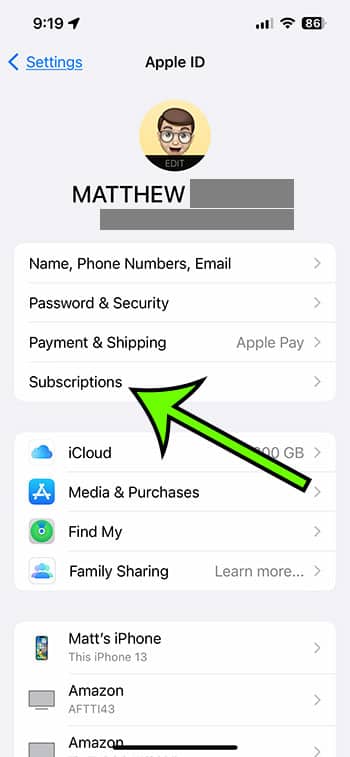
Step 3: In the top section, select Subscriptions.
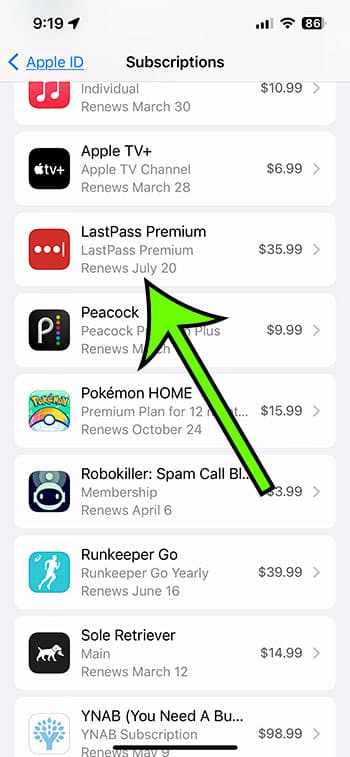
Step 4: Choose the iPhone subscription you wish to cancel.
Step 5: Click the Cancel Subscription link.
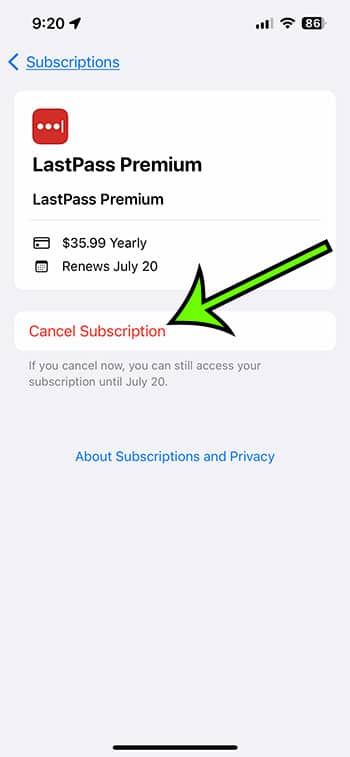
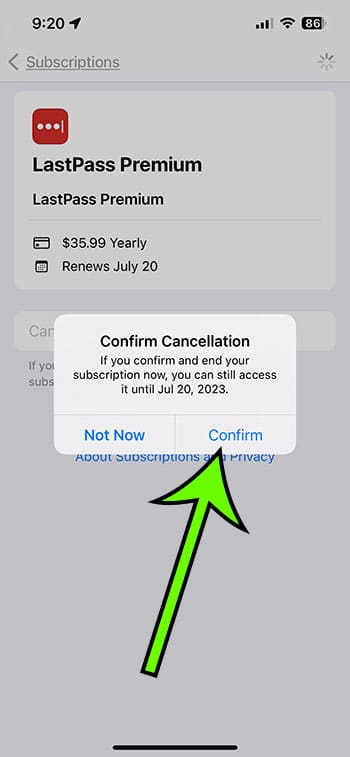
Step 6: Tap the Confirm button to confirm that you want to cancel this subscription when the current term expires.
Now that you know how to delete subscriptions on iPhone 13, you may return to this site on a regular basis to ensure that you haven’t forgotten about any subscriptions or that you don’t have any that you’re paying for but not using.
Additional Details on Cancelling or Deleting iPhone 13 Subscriptions
In the list of subscriptions on your device, you will notice an “expired” or “inactive” section.
These are the subscriptions that you used to have but are no longer active.
Regrettably, you cannot erase these subscriptions from this menu manually, and you must wait a year for them to be removed.
You can also access your iPhone subscriptions by opening the App Store and tapping your profile icon at the top-right of the screen.
You can then select the Subscriptions option to view the information you saw in the previous section.
A video of this method for canceling iPhone subscriptions is shown below:
You might also launch the iTunes application on your Windows laptop or desktop computer.
You can then choose Account, followed by View My Account, and then View Account to open the correct menu. Then, go down to the Settings area of the menu and click the Manage icon to the right of Subscriptions.
A menu identical to the one discussed previously can be found here.
It’s important to note that canceling most subscriptions on your iPhone will not result in a refund. The subscription will simply end when the current subscription period expires.

Matt Jacobs has been working as an IT consultant for small businesses since receiving his Master’s degree in 2003. While he still does some consulting work, his primary focus now is on creating technology support content for SupportYourTech.com.
His work can be found on many websites and focuses on topics such as Microsoft Office, Apple devices, Android devices, Photoshop, and more.