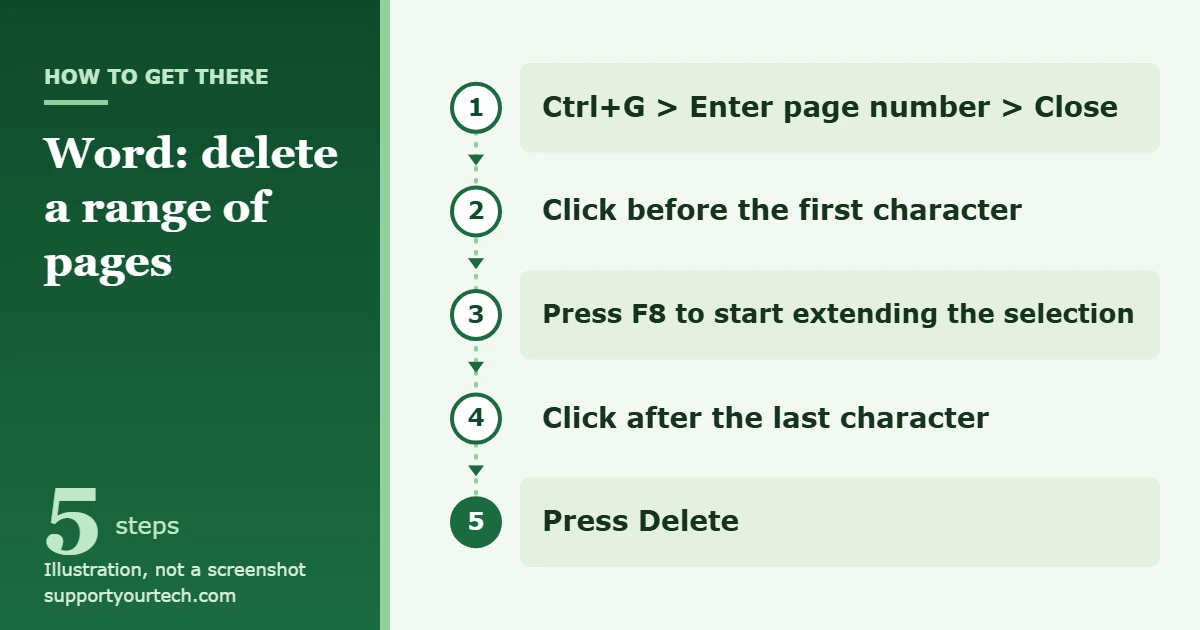
To delete multiple pages in Word, select all the content on those pages and press Delete. For a long range, press Ctrl+G, type the first page number in the Enter page number box, press Enter and select Close, click before the first character on that page, press F8, then click after the last character on the final page you want gone and press Delete.
Applies to: Word for Microsoft 365, Word 2024 and Word 2021 on Windows, with notes for Word for Mac. Checked against Microsoft Support on October 7, 2026.
How deleting pages works in Word
Word does not treat a page as a separate object you can pick up and throw away. A page is simply where text, pictures and tables happen to fall, so Microsoft’s instructions for removing a page all come down to the same idea: select the content and delete it. Once the content is gone, the pages it occupied disappear and everything after it moves up.
This also explains a common mix-up. The Pages view of the Navigation pane shows a thumbnail of every page, but Microsoft documents those thumbnails only as a way to jump to a page. Choosing a thumbnail takes you there; it does not select the page’s content, so pressing Delete afterward will not remove the page. Some other Microsoft apps, such as Publisher, let you right-click a page in a page pane and delete it, but Microsoft’s instructions for Word do not include such a command. Use one of the selection methods below instead.
Before you start
- Save a copy of the document. Deleting many pages at once is easy to undo right away, but much harder to fix after you have saved, closed or made other edits.
- Note the page numbers you want to remove. Write down the first and last page of each range. If you remove several separate ranges, start with the one nearest the end of the document so the page numbers of the earlier ranges do not change while you work.
- Show formatting marks. Press Ctrl+Shift+8 (do not use the numeric keypad), or go to Home and select Show/Hide. You can then see paragraph marks, page breaks and section breaks, which helps you judge exactly where a page’s content starts and ends.
Delete a range of consecutive pages with Go To and F8
This method selects everything from the top of one page to the end of another without dragging through dozens of pages with the mouse. It works the same whether you are removing three pages or thirty.
- Press Ctrl+G. Word opens the Go To dialog box, which Microsoft describes as the way to navigate to a specific page.
- Type the number of the first page you want to delete in the Enter page number box, press Enter, and then select Close. Word jumps to that page.
- Click just before the first character at the top of that page. The blinking cursor marks where the deletion will begin.
- Press F8. This starts extending the selection, so the next place you click becomes the end of the selection instead of a new cursor position.
- Scroll down to the last page you want to remove and click just after the last character on that page. Everything from your starting point to this spot is now highlighted.
- Check that the highlight starts and ends where you expect, then press Delete. The selected pages disappear and the content that followed them moves up.
If you change your mind before deleting, press Esc to stop extending the selection. If you deleted too much, press Ctrl+Z immediately to undo the previous action.
Delete a few pages by clicking and dragging
For two or three pages that fit comfortably on screen, a plain mouse selection is quicker:
- Click at the start of the first page you want to remove, then hold the mouse button down.
- Drag down to the end of the last page you want to remove and release the button. The content is highlighted.
- Press Delete.
Dragging becomes awkward over long distances because the document scrolls quickly. If the highlight overshoots, you can fine-tune it from the keyboard: with the cursor at the start of a line, Shift+Down arrow selects a line at a time and Ctrl+Shift+Down arrow selects a paragraph at a time. For anything longer than a few pages, the Go To and F8 method above is more reliable.
Delete separate pages one at a time
Word can only delete one continuous selection at a time, so pages that are not next to each other (for example, pages 3, 8 and 15) need a separate pass each. Microsoft’s own method selects exactly one page of content for you:
- Click or tap anywhere on the page you want to delete. Start with the highest page number on your list.
- Press Ctrl+G to open Go To.
- In the Enter page number box, type \page (with the backslash).
- Press Enter, and then select Close. The content of the current page is highlighted.
- Check that a full page of content is selected, then press Delete.
- Repeat for the next page on your list, working toward the start of the document.
Working from the end backward matters because every deleted page renumbers the pages after it. If you deleted page 3 first, the page that used to be 8 would become page 7, and it is easy to remove the wrong one. Microsoft’s step-by-step instructions are on its Delete a page in Word page.
In a long document, the Navigation pane helps you locate the pages before you select them:
- Press Ctrl+F, or select the View tab and choose Navigation Pane.
- Select Pages to see a thumbnail of each page.
- Choose a thumbnail to go to that page, then click inside the page and use one of the selection methods above.
If your document uses heading styles, the Headings view of the same pane shows its structure, which makes it easier to see where a chapter or section you want to remove begins and ends. Microsoft notes that headings inside tables, text boxes, headers and footers do not appear there. For more on the pane, see Use the Navigation pane in Word.
Check the result
- Look at the join. Scroll to where the deleted pages used to be and check that the text before and after now flows correctly, with no half sentence or orphaned heading left behind.
- Look for a new blank page. With formatting marks showing, delete any leftover empty paragraph marks. A manual page break can be removed by double-clicking it and pressing Delete.
- Update the table of contents. If the document has an automatic table of contents, select the References tab, select Update Table, choose Update entire table, and select OK. Choosing Update page numbers only ignores changes to the heading text, so it will not remove headings you deleted. Word cannot refresh a table of contents that was typed by hand.
- Undo if needed. Ctrl+Z undoes the previous action. If you have already saved and closed the file, reopen the copy you saved before you started.
Troubleshooting
A blank page is left behind
Leftover empty paragraphs or a page break usually cause this. Show formatting marks with Ctrl+Shift+8, select the empty paragraph marks or the break, and press Delete. If the empty paragraph shows a small square bullet, the Page break before setting may be on: open the paragraph settings, go to the Lines and Page Breaks tab, and clear Page break before. Our guide on deleting a blank page in Word that won’t go away covers every cause in detail.
The last page will not go away
When the document’s final paragraph mark cannot fit at the bottom of the previous page, Word keeps an extra page just for it. Microsoft’s fix is to select that final paragraph mark, select inside the Font size box, type 01, and press Enter. If it still does not fit, go to Layout > Margins > Custom Margins and make the bottom margin smaller. See Microsoft’s Delete a blank page instructions.
Headers, margins or orientation changed after deleting
Your selection probably included a section break. When a section break is deleted, Word combines the text before and after it into one section, and the combined section uses the formatting of the section that followed the break. Press Ctrl+Z to restore it, then redo the selection so it stops just before the break. Microsoft explains this behavior on its Delete a section break page. If a section break was all that forced a new page, our guide to getting rid of a page break in Word explains the difference between page and section breaks.
Every click extends the selection
Extend mode is still on from pressing F8. Press Esc to stop extending the selection, then click normally.
The highlighted area is not quite the page you wanted
Do not press Delete yet. Hold Shift and use the arrow keys to extend or shrink the selection, or press F8 and click where the selection should end. Microsoft’s own steps tell you to verify that a page of content is selected before deleting, and that check takes only a moment.
Frequently asked questions
Can I delete pages by selecting their thumbnails in the Navigation pane?
No. Microsoft describes the Pages thumbnails as a way to go to a page. Selecting a thumbnail moves you there but does not select the page’s content, so you still need to select the text and press Delete.
Can I delete pages that are not next to each other in one step?
Not with Word’s built-in tools. Delete each page or range separately, starting from the end of the document so the remaining page numbers stay correct.
How do I delete multiple pages in Word for Mac?
The principle is the same: select the content on those pages and press Delete. Microsoft’s Word for Mac instructions use Command+8 to show paragraph marks, which helps you remove leftover empty paragraphs and page breaks afterward.
Will deleting pages remove my headers and footers?
Not by itself. Headers and footers belong to sections, so they only change if your selection includes a section break. If they change unexpectedly, undo the deletion and keep the section break out of the selection.
Can I get deleted pages back?
Press Ctrl+Z right away to undo the deletion. If you have already saved and closed the document, restore the copy you saved before you started.
If you only need to move pages rather than remove them, see how to rearrange pages in Word. For the full list of selection shortcuts, see Microsoft’s Keyboard shortcuts in Word.
Related: how to copy a page from one Word document to another.

Matt Jacobs has been working as an IT consultant for small businesses since receiving his Master’s degree in 2003. While he still does some consulting work, his primary focus now is on creating technology support content for SupportYourTech.com.
His work can be found on many websites and focuses on topics such as Microsoft Office, Apple devices, Android devices, Photoshop, and more.