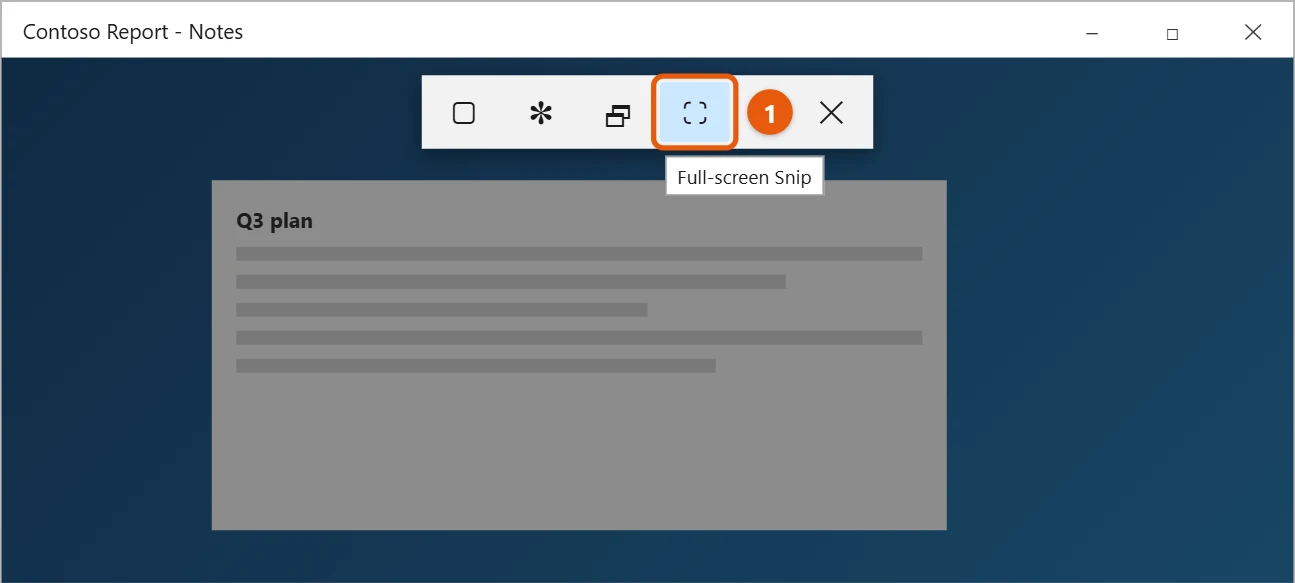
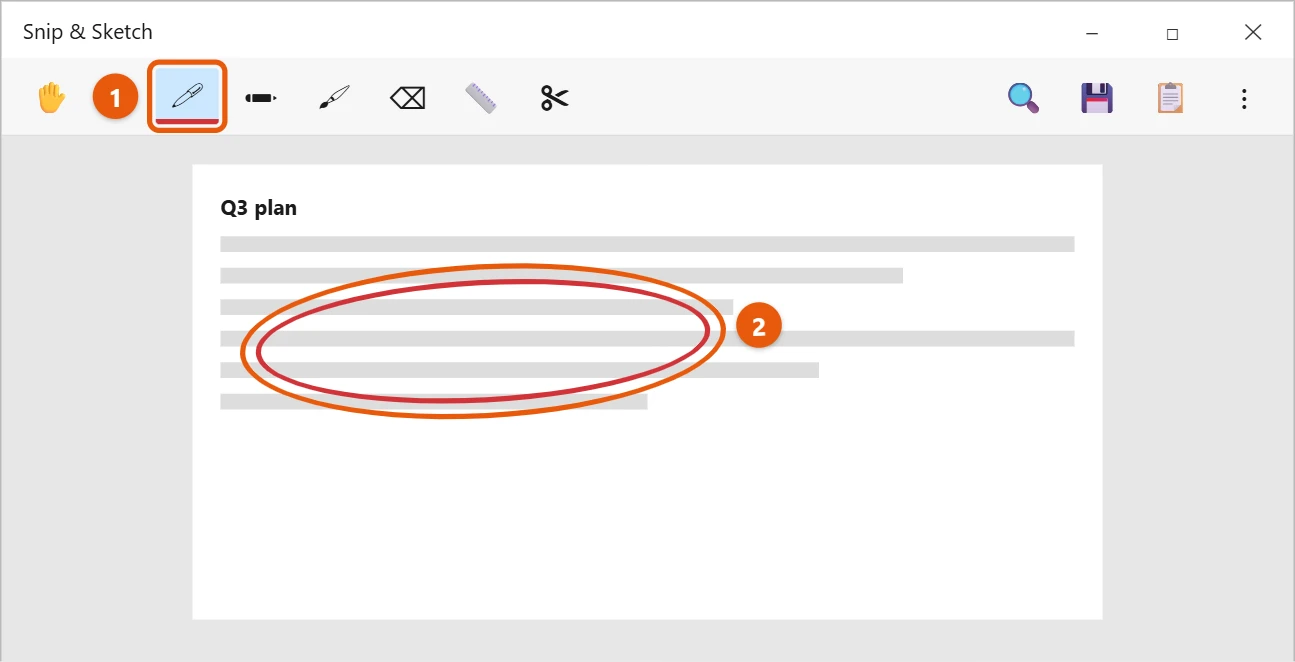
To draw on your screen in Windows 10, press Windows key + Shift + S and select Full-screen Snip. Select the notification that appears to open the picture in Snip & Sketch, then draw on it with the Ballpoint pen, Pencil or Highlighter. Save it with Ctrl + S.
Applies to: Windows 10, version 1809 and later. Checked against Microsoft Support on September 27, 2026.
Draw on a screenshot with Snip & Sketch
- Open what you want to draw on.
- Press Windows key + Shift + S. The screen dims and a small toolbar appears at the top.
- Select Full-screen Snip, or drag to select part of the screen.
- Select the notification in the corner to open it in Snip & Sketch.
- Select the Ballpoint pen, Pencil or Highlighter. Select it again to change the color and size.
- Draw with your mouse, pen or finger. Use the Eraser to fix mistakes.
- Press Ctrl + S to save it, or Ctrl + C to copy it and paste it into an email or chat.
Draw with a pen or touch screen
If your PC has a pen or touch screen, turn on Touch writing in Snip & Sketch (the hand icon) to draw with your finger. To open drawing tools quickly with a pen, press Windows key + W for the Windows Ink Workspace.
Draw on the live screen while presenting
- PowerPoint: during a slideshow, press Ctrl + P to switch the pointer to a pen and draw on the slide. Press E to erase your marks and Esc to go back to the pointer.
- Teams meetings: while sharing in a meeting, some versions offer annotation tools that let you and others draw over the shared screen.
- Microsoft Whiteboard: a free app from Microsoft Store for drawing and sketching ideas from scratch.
Draw on a web page or PDF in Edge
In Microsoft Edge, press Ctrl + Shift + S to start Web capture, select an area, and choose Draw to mark it up. For PDFs open in Edge, use the Draw button on the PDF toolbar, then save the file to keep your notes.
Use the ruler for straight lines
In Snip & Sketch, select the ruler icon. Drag it into place and draw along its edge to get a straight line. Scroll the mouse wheel over the ruler to rotate it.
Troubleshooting
- Windows + Shift + S does nothing. Update Snip & Sketch from Microsoft Store and restart the PC. If another screenshot tool is installed, it may have taken over the shortcut.
- The notification disappears before you click it. Open Snip & Sketch from the Start menu and select New, or paste the snip from the clipboard into Paint and draw there.
- The pen draws in the wrong place. Calibrate your pen under Control Panel > Tablet PC Settings > Calibrate.
Frequently asked questions
Can I draw over my screen while I’m presenting?
Snip & Sketch draws on a picture of your screen, not the live screen. Use a presentation or meeting app’s pen tool instead, as shown above.
Where are my screenshots saved?
Snip & Sketch saves only when you choose to. For other screenshots, see how to change where screenshots are saved in Windows 10.
How do I take a regular screenshot?
See how to take a screenshot on Windows 10. To record video instead, see how to record your screen in Windows 10.
Microsoft’s reference is Use Snipping Tool to capture screenshots. More help is on our Windows Help & Guides page.
Can I change the pen color and thickness?
Yes. Select the pen once to open its options, then pick a color and drag the size slider. Each pen remembers its own settings.
Can I undo a mistake?
Press Ctrl + Z to undo the last stroke, or use the Eraser. Select the Eraser twice and choose Erase all ink to start over.
Can I draw on a photo I already have?
Yes. Open Snip & Sketch, select the folder icon, open the photo, and draw on it the same way.
Is Snip & Sketch on Windows 11?
Its features moved into Snipping Tool on Windows 11, which works almost the same way.
Related: how to make the eraser bigger in Paint on Windows 11.

Matt Jacobs has been working as an IT consultant for small businesses since receiving his Master’s degree in 2003. While he still does some consulting work, his primary focus now is on creating technology support content for SupportYourTech.com.
His work can be found on many websites and focuses on topics such as Microsoft Office, Apple devices, Android devices, Photoshop, and more.