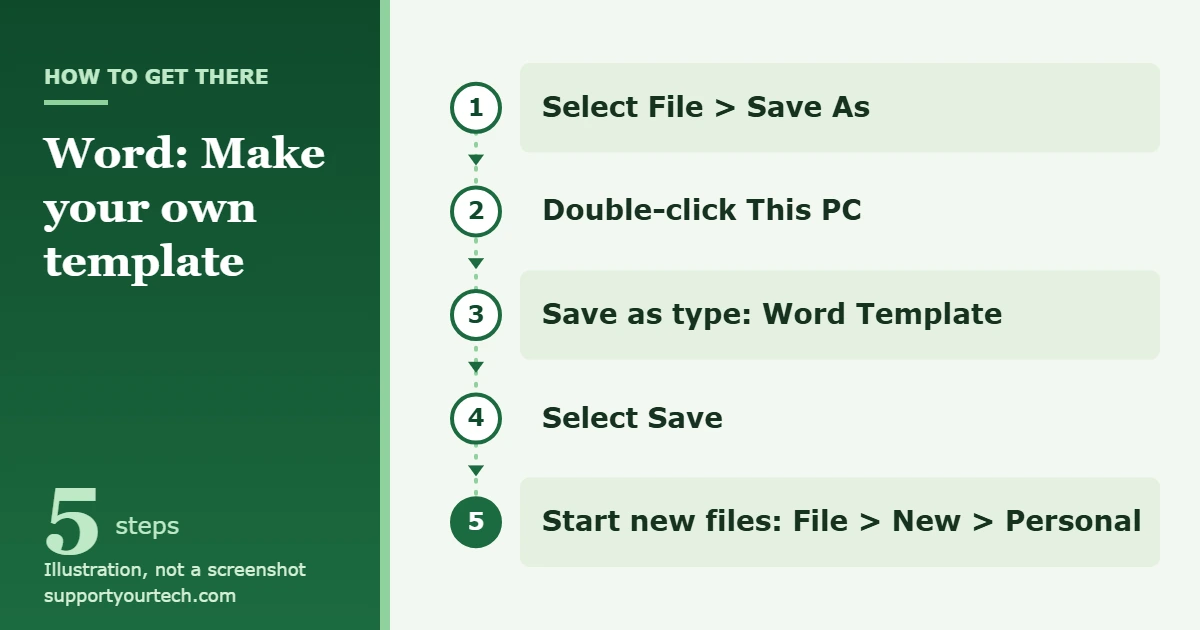
To make your own template in Word, set up a document with the layout, styles and standard text you want to reuse, then select File > Save As, double-click This PC, type a name, and choose Word Template in the Save as type list before you select Save. To use it later, go to File > New > Personal and pick your template. Word opens a new copy, so the template itself stays unchanged.
Applies to: Word for Microsoft 365, Word 2024, Word 2021, Word 2019 and Word 2016 on Windows.
What a Word template is and when to use one
A template is a special Word file that works as a starting point. When you create a document from it, Word gives you a new, untitled copy that already has the margins, fonts, headers, logo and standard wording you set up. You fill in the details and save the result as a normal document. The template file is not touched, so it is ready for the next time. Once a document is based on your template, you can ask Copilot to draft the content in Word while keeping the template’s headings and layout.
Templates are worth making for any document you produce again and again: a letterhead, an invoice, a meeting agenda, a monthly report, a fax or memo cover sheet, or a form that colleagues fill in. If you only ever copy an old file and type over it, a template saves you from accidentally overwriting last month’s version. Résumés are a good candidate too: once you build a resume layout in a blank Word document, saving it as a template gives you a fresh copy for each job application. Starting from a letterhead you already built in Canva? The guide on turning a Canva design into a Word file shows when to convert it and when to rebuild it as a template.
Word uses three file types you will see in this guide:
- .docx is an ordinary Word document.
- .dotx is a Word template. This is the right choice for most templates.
- .dotm is a macro-enabled template. Use it only if your template contains macros (small recorded or programmed automations). There is also the older .dot format, which you only need for very old versions of Word.
Before you start: plan what stays and what changes
Look at a finished example of the document and sort its content into two groups:
- Fixed content belongs in the template: page size and margins, fonts and heading styles, the header and footer, your logo, contact details, legal text and section headings.
- Variable content changes every time: names, dates, amounts, addresses and the main body text. In the template, replace these with short prompts such as [Client name] or [Date], or with fill-in fields (covered below).
Make one template per document type rather than one template that tries to do everything. A letter template and an invoice template are easier to maintain separately.
How to make your own template in Word
- Open a blank document or a document you already like. Go to File > New and choose a blank document, or open an existing file that has the right layout. If you start from an old file, Word keeps the original; you will save the template as a separate file.
- Set up the page. On the Layout tab, select Margins and pick a preset, or choose Custom Margins to enter your own. Set the page size and orientation on the same tab if your document needs them.
- Format with styles, not manual formatting. On the Home tab, right-click a style in the Styles gallery, such as Normal or Heading 1, and choose Modify to set its font, size, color and spacing. If you already formatted some text the way you want, select it, right-click the style and choose Update [style name] to Match Selection. Styles saved in the template carry over to every document you create from it. Applying them works the same way as when you make something a heading in Word. For matching fonts and colors across those styles, set up and save a custom theme first, as covered in how to change the theme in Word.
- Add the header, footer and logo. Go to Insert > Header or Footer and choose a design. Type your company name, address or page numbers, and add a logo if you use one. Select Close Header and Footer or press Esc when you finish.
- Type the fixed text and the prompts. Add standard wording, section headings and tables. Put a clear prompt in square brackets wherever the details change, for example [Recipient name] or [Invoice number].
- Remove one-time details. Delete real names, dates, account numbers, comments and tracked changes that belong to a single document. Anything left in the template will appear in every new file.
- Save it as a template. Select File > Save As and double-click This PC. Type a descriptive name in the File name box, such as Company letterhead. In the Save as type list, choose Word Template, or Word Macro-Enabled Template if the file contains macros. Word switches to the Custom Office Templates folder automatically. Leave it there and select Save.
- Close the template. Close the file so you do not keep typing into the template itself.
How to create a new document from your template
- Open Word and select File > New.
- Select Personal. In some versions of Word this option is labeled Custom instead.
- Select your template. Word opens a new, untitled document based on it.
- Replace the bracketed prompts with real details and save the file as a normal Word document.
Each time you start a document this way, the template creates a copy of itself, and the result you save as .docx or .docm is stored separately from the template. That is what keeps your original clean.
How to edit a template you already made
To change the template itself, open the .dotx file rather than starting a new document from it:
- Select File > Open and double-click This PC.
- Browse to the Custom Office Templates folder in your Documents folder.
- Select your template and select Open.
- Make your changes, then save and close the template.
Your changes apply to documents you create from the template afterward. Documents you made earlier keep their old content and layout.
Optional: add fill-in fields to the template
For forms and documents other people complete, content controls work better than typed prompts. They show gray instruction text and can limit what people enter. You need the Developer tab, which Word hides by default:
- Select File > Options > Customize Ribbon.
- Under Customize the Ribbon, select Main Tabs, check Developer and select OK.
- Open your template, go to the Developer tab and turn on Design Mode in the Controls group.
- Click where you want a field and choose a control: Plain Text Content Control for short text, Rich Text Content Control for formatted or longer text, Date Picker Content Control for dates, Drop-Down List Content Control for a fixed list of choices, or Check Box Content Control for yes/no items.
- For a drop-down list, select the control, select Properties, then select Add and type each choice in the Display Name box.
- To change the gray instruction text, keep Design Mode on, edit the text inside the control, then select Design Mode again to turn it off.
- Save and close the template.
If you want people to fill in the fields without changing the rest of the page, open the template and go to Review > Restrict Editing. Choose a formatting or editing restriction first, otherwise the next button stays unavailable, then select Yes, Start Enforcing Protection. A password is optional, but without one anyone can remove the restriction. A forgotten password can’t be recovered, so store it somewhere safe.
Because every new document inherits whatever is in the template, old comments, tracked changes or author details can spread to everything you send. Word’s Document Inspector can find them:
- Save a copy of the template first, because removed content may not come back with Undo.
- In the copy, select File > Info > Check for Issues > Inspect Document.
- Select Inspect, then select Remove All only next to the items you want gone.
Be careful with the Headers, Footers, and Watermarks result. In a template, those are usually content you want to keep, so leave that item alone.
Change the Normal template instead (for every new blank document)
If you want every new blank document to start with a different font or margins, you do not need a separate template. Word stores these defaults in Normal.dotm, the template that opens whenever you start Word. Changes to Normal.dotm affect only documents you create from then on. Changing the automatic font color in Word is a simple example that saves the change to the Normal template.
A style can also be added to the Normal template without opening the file: right-click the style, choose Modify, and select New documents based on this template at the bottom of the dialog box. Use a personal template for a specific document type and the Normal template only for defaults you want everywhere.
Word for the web and Word for Mac
Word for the web: To use a custom template in the browser, keep it as a regular .docx file in OneDrive. Open it in Editing view, select Create a Copy, then choose Create a copy online or Download a copy, and work in the copy. Leave the original file unchanged.
Word for Mac: The steps in this article are for Windows and may differ in Word for Mac. On a Mac, follow the macOS tab on Microsoft’s Create a template page.
Troubleshooting
My template does not appear under Personal
Check that you chose Word Template in Save as type, so the file ends in .dotx or .dotm rather than .docx. Then check where it was saved. Word saves new templates to the folder named in File > Options > Save > Default personal templates location. If that box is empty or points somewhere other than the folder where your template is, type the path of your Custom Office Templates folder there and move the template into it. If Personal is not shown, look for Custom.
I accidentally changed the template while filling it in
This happens when you open the .dotx with File > Open and then type your document into it. Remove the one-off content, save the template again, and start future documents from File > New > Personal.
Templates from an older version of Word are missing
Templates from earlier versions of Office work once you move them into the Custom Office Templates folder.
Old names or dates appear in every new document
That content is still in the template. Open the template from the Custom Office Templates folder, delete the details, and save it.
Fill-in fields or macros do not work
If content controls are unavailable, the file may be in an older format. Select File > Info > Convert, select OK, and save. If the template contains macros, save it as a Word Macro-Enabled Template (.dotm), the format meant for templates that contain macros. At work or school, macros and template folders may also be controlled by your IT department, so ask them if a shared template does not behave as expected.
Frequently asked questions
What is the difference between .docx and .dotx?
A .docx file is a document you open and edit directly. A .dotx file is a template: starting a document from it gives you a new copy, so the template stays the same.
Can I turn an existing document into a template?
Yes. Open the document, remove the details that change each time, and save it with Save As using the Word Template type. The original .docx file stays as it was.
Where are my Word templates saved?
By default, Word saves personal templates in the Custom Office Templates folder inside Documents. You can see or change the folder in File > Options > Save, under Default personal templates location.
Can I start from one of Microsoft’s templates?
Yes. Go to File > New and search for a document type, such as memo or invoice. Customize the design, then save it as your own template with Word Template as the file type. If you are building a memo, creating a memo in Word gives you a good base for a reusable memo template.
How do I share a template with other people?
Send them the .dotx file or put it in a shared folder. Each person can copy it into their own Custom Office Templates folder so it appears under Personal.
How do I delete a template I no longer need?
Close Word, open the Custom Office Templates folder in File Explorer, and delete the template file. It will no longer appear under Personal.
Next, create one document from your new template and fill it in with realistic details, such as a long name or several pages of text, to check that the layout holds up before you rely on it. Microsoft’s Edit templates page covers more content control and protection options.
Related: editing a template in Word, inserting a placeholder and creating a label template.

Matt Jacobs has been working as an IT consultant for small businesses since receiving his Master’s degree in 2003. While he still does some consulting work, his primary focus now is on creating technology support content for SupportYourTech.com.
His work can be found on many websites and focuses on topics such as Microsoft Office, Apple devices, Android devices, Photoshop, and more.