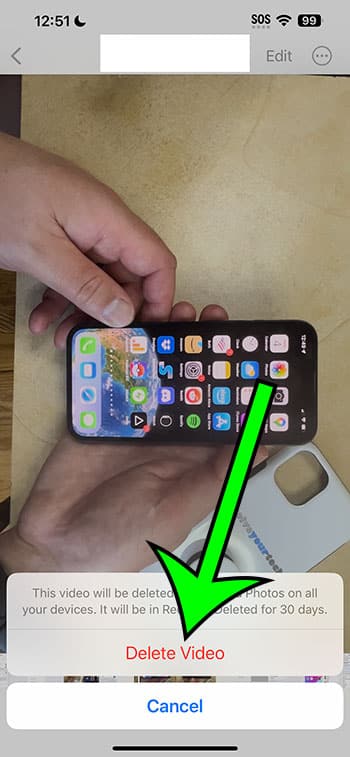
You can deleted a video recording on your iPhone by opening the Photos app, selecting the video, and then tapping the trash can icon and choosing Delete Video.
Our article continues below with more about this process, including what you need to do if you would like to permanently delete that video from your iPhone as well.
You can also watch this video about how to delete recorded video on iPhone for more information on this topic.
Introduction
Hello there, brave iPhone user! Have you ever recorded a video on your iPhone that you later decided you didn’t want? Maybe it was a funny blooper of a friend, or perhaps a video of the sky when you thought you were taking a photo. Whatever the case may be, don’t fret! You’ve landed at the right place. I’m going to guide you on a journey into the depths of your iPhone’s storage and reveal the secrets of deleting those unwanted videos.
Related: How to Record iPhone 13 4K Video
Steps for Deleting iPhone Video Recordings
The steps in this article were performed using an iPhone 14 Plus in the iOS 17 operating system, but will also work for most other iPhone models and iOS versions.
Step 1: Grab That iPhone!
First things first, make sure your iPhone is in your hand. Got it? Great! Now, we’ll begin our adventure. It’s going to be fun, I promise.
Step 2: Let’s Head to the Photos App
The treasure trove of all your memories, the Photos app is where the magic happens. Look for the colorful flower icon on your home screen. Tap it! As it opens, you’ll see all your photos and videos in one place.
Step 3: Finding the Culprit
This step involves a little detective work. You’ll need to scroll through your media until you find the video you want to bid farewell to. Videos usually have a small white play icon in the bottom left corner, which helps differentiate them from photos. If you’ve recently recorded the video, it’ll likely be near the bottom or in the “Recents” album. Got your eyes on the target? Awesome!
Step 4: Time to Take Action
Tap on the video to open it up. Now, take a deep breath. Do you see that little trash can icon at the bottom right corner? That’s our tool for the job. Tapping that icon is like telling the video, “Sorry, but it’s time for you to go.”
Step 5: Confirming Your Bold Move
A message will pop up asking if you’re sure you want to delete the video. It might seem like your iPhone is second-guessing you, but it’s just being a good friend and making sure you don’t have any regrets later. Tap “Delete Video” to seal the deal.

Step 6: But Wait, There’s More!
Deleting the video doesn’t mean it’s gone forever, at least not immediately. Your iPhone has a special folder called “Recently Deleted” where videos and photos hang out for 30 days after you’ve hit delete. Think of it as a safety net. If you change your mind and want to retrieve the video, you can! But if you’re certain about your decision, you can delete it from there too, for good.
Step 7: Double-Delete to Finalize
Want to make absolutely sure the video is gone for good? Venture into the “Recently Deleted” album, find the video, tap on it, and hit that trash can icon again. A prompt will appear, this time warning you that the video will be permanently deleted. Tap “Delete” and you’ve officially made your decision final!
Video About Deleting iPhone Recordings
Conclusion
Deleting videos from your iPhone can feel like a daunting task, especially if you’re not familiar with how the device works. But now, you’ve got the skills, the know-how, and the confidence to take control of your storage and curate your memories as you see fit. Remember, while it’s easy to capture moments with the click of a button, it’s just as easy to free up space and keep your photo library organized.
So the next time you accidentally record your shoes instead of the surprise birthday party, or when you realize you’ve taken one too many takes for that perfect vlog entry, you’ll know exactly what to do. Your iPhone is a powerful tool, and now, you’re its master. Happy filming, and happy deleting!

Matt Jacobs has been working as an IT consultant for small businesses since receiving his Master’s degree in 2003. While he still does some consulting work, his primary focus now is on creating technology support content for SupportYourTech.com.
His work can be found on many websites and focuses on topics such as Microsoft Office, Apple devices, Android devices, Photoshop, and more.