Your iPhone’s YouTube app stores a ton of information about the videos you watch.
It then makes recommendations to you based on what other users with comparable histories have viewed using that information.
This works incredibly well if you only ever watch videos in particular categories, but it can be affected if you watch a video that is different from what you usually watch or if someone else uses your phone to watch something.
You can start rebuilding your watch history and enhancing your suggestions by following our tutorial’s instructions on how to delete the YouTube history on an iPhone 13.
How to Erase Your Viewing History in the YouTube App on Your iPhone
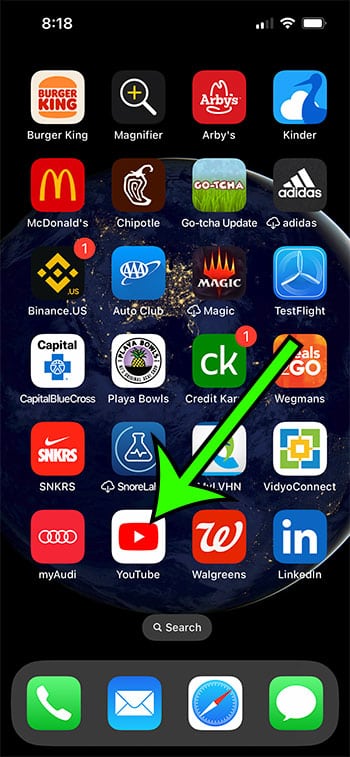
- Select YouTube.
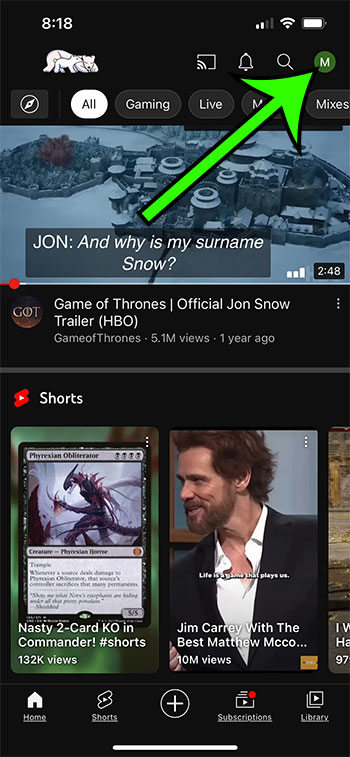
- Touch your profile photo.
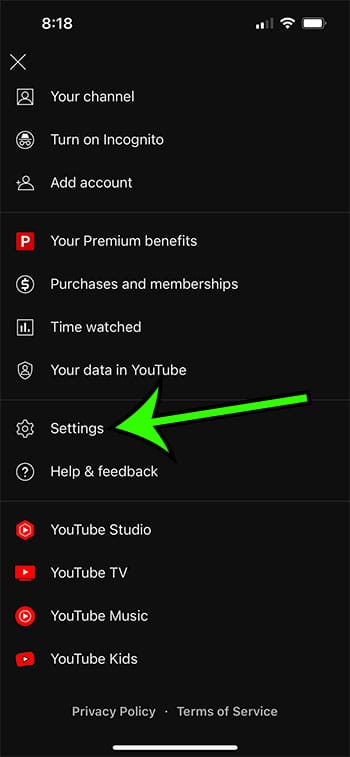
- Choose Settings.
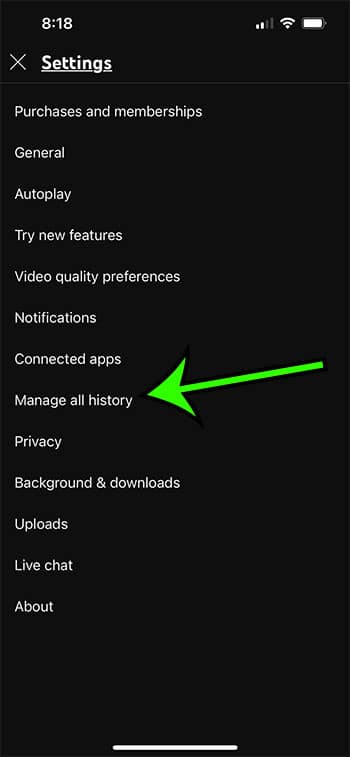
- Touch Manage all history.
- Tap the Delete button.
- Select Delete all time.
More details on this subject, including images of this process, are provided in our guide’s subsequent sections.
One of the most popular methods for individuals to watch videos is on mobile devices like iPhones and Android smartphones using the YouTube app.
This is because the app is so adept at recommending other videos that it believes you will like from its enormous video library.
There might be something in your watch history that’s having a negative effect if you used to rely on this to find new content, but have discovered that the videos being recommended to you aren’t ones you want to view.
Fortunately, you may remove your YouTube watch history by following the instructions below, which will help you enhance the content recommendations you receive.
Related: Check out our guide on sharing YouTube videos from an iPhone if you’ve been looking for a simple sharing option.
How to Remove History from the iPhone’s YouTube App (Guide with Pictures)
The iOS 16 operating system-powered iPhone 16 was used to carry out the instructions in this guide. I’m utilizing the most recent YouTube app that was accessible at the time this post was created.
You may download the YouTube app for the iPhone from this page if you don’t already have one.
Step 1: Launch the YouTube app on your iPhone.
Step 2: Tap the icon for your profile in the top-right area of the display.
Step 3: From the menu, select the Settings option.
Step 4: Choose the Manage all history option.
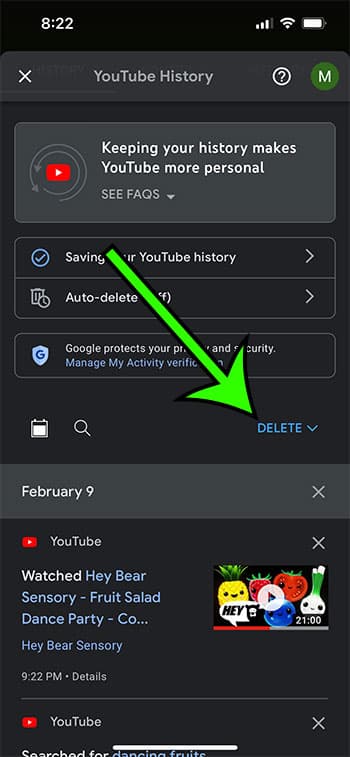
Step 5: At the middle of the screen, select Delete.
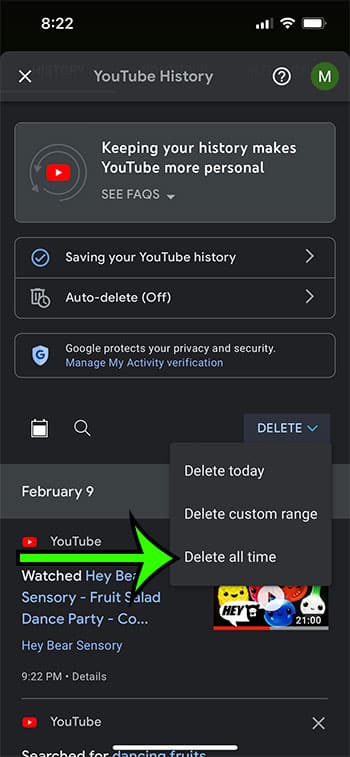
Step 6: Tap the Delete all time button to remove all of your YouTube viewing history.
You can utilize this technique whenever you have seen a video that appears to be negatively affecting the types of videos that are recommended to you now that you are aware of how to clean YouTube history on iPhone 13.
Remember that even after you delete your watch history, YouTube may still utilize information it gathers from other apps to determine the videos that it recommends to you. As a result, you might not be starting from scratch.
Additional Details About Your iPhone YouTube History
YouTube keeps the information about the videos you look for in addition to the viewing history we have covered in this article.
Thankfully, a similar series of methods can also be used to delete this.
- Activate the YouTube app.
- Choose your profile image at the top of the screen.
- Select the Settings item.
- Choose Manage all history from the menu.
- Uncheck the Include your searches on YouTube option.
If you believe you might need to wipe your history frequently, you might also think about using YouTube’s Incognito mode.
You can watch videos more conveniently with this choice because they won’t alter your history or other video recommendations.
By touching your profile symbol and selecting Turn on Incognito from the menu, you may access YouTube incognito mode.
Your profile icon will be replaced by a hat and pair of glasses, indicating that you are in incognito mode.
By pressing that symbol and selecting Turn off Incognito, you can leave the Incognito mode.

Matt Jacobs has been working as an IT consultant for small businesses since receiving his Master’s degree in 2003. While he still does some consulting work, his primary focus now is on creating technology support content for SupportYourTech.com.
His work can be found on many websites and focuses on topics such as Microsoft Office, Apple devices, Android devices, Photoshop, and more.