How you unlock a Word document depends on why it’s locked. If Word says the file is locked for editing, close every other copy of it, including a hidden Word process in Task Manager, and try again. If you can open it but can’t type, select Review > Restrict Editing > Stop Protection, or select Enable Editing or Edit Anyway in the yellow bar at the top. If the document asks for a password to open, you need that password: Word has no legitimate way around it.
Applies to: Word for Microsoft 365, Word 2024, 2021 and 2019 on Windows and Mac, and Word for the web. Last reviewed October 7, 2026.
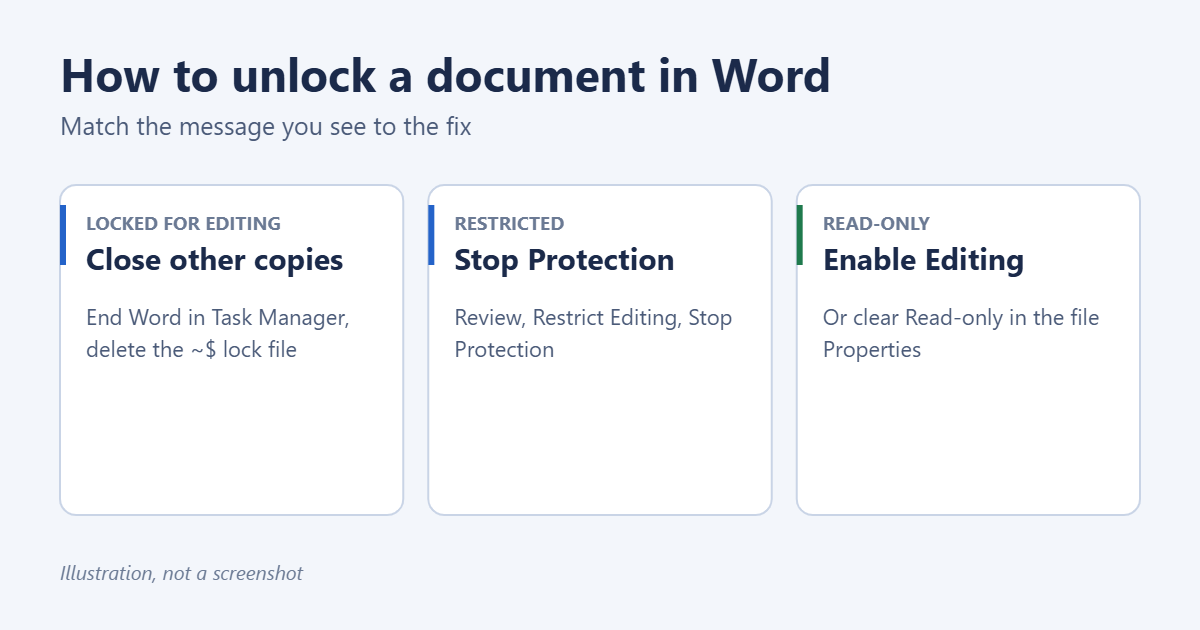
Find out why the document is locked
- “File in use” or “locked for editing by another user”: someone else, or another copy of Word on your PC, has the file open. See Fix “locked for editing”.
- You can open it, but typing does nothing and a Restrict Editing pane appears: the author restricted editing. See Stop editing restrictions.
- A yellow bar says Protected View, Read-Only or Marked as Final: see Turn off read-only modes.
- Word asks for a password before it opens the file: the document is encrypted. See Remove a password you know.
Fix “locked for editing”
Word locks a file while it’s open so two people don’t overwrite each other’s changes. The lock can get stuck if Word crashes or is still running in the background.
- Check whether someone else has it open. If the file is on a shared drive, the message names the user. Ask them to close it, or select Read Only or Notify to be told when it’s free.
- Close every Word window on your PC.
- End hidden Word processes. Press Ctrl + Shift + Esc to open Task Manager. On the Processes tab, select any Microsoft Word entry and select End task.
- Delete the owner file. In the document’s folder, Word creates a small hidden file whose name starts with ~$, such as ~$port.docx. In File Explorer, select View > Show > Hidden items, then delete that ~$ file. It only holds the lock, not your content.
- Open the document again.
If the file is in OneDrive or SharePoint, several people can edit at once. Open it from Word with File > Open rather than a downloaded copy, and make sure AutoSave is on. Microsoft’s guide to unlocking a file that’s locked for editing covers phones and tablets.
Stop editing restrictions
Authors can limit what others change, for example allowing only comments or form filling.
- Open the document and select the Review tab.
- Select Restrict Editing (on a Mac, Protect > Protect Document).
- In the pane that opens, select Stop Protection at the bottom.
- Enter the password if asked, then select OK.
If you don’t know the password, ask the person who sent you the document. If the restriction is only for tracked changes, you may still be able to type: your edits are simply recorded for the author to review.
Turn off read-only modes
Protected View
Files from the internet or email attachments open in Protected View for safety. If you trust the file, select Enable Editing in the yellow bar. See how to enable editing in Word for more detail.
Marked as Final
The author marked the document as complete. Select Edit Anyway in the yellow bar. To remove the marking for good, select File > Info > Protect Document and select Mark as Final again to turn it off.
Read-only recommended
Word asks whether to open the file as read-only. Select No to edit it. To stop the question, open the file, select File > Save As > More options > Tools > General Options, clear Read-only recommended, and save.
Read-only file attribute
- Close the document.
- In File Explorer, right-click the file and select Properties.
- On the General tab, clear Read-only. If you see an Unblock checkbox, select it too.
- Select OK and open the file again.
On a Mac, select the file in Finder, press Command + I, and clear Locked.
Remove a password you know
If the document asks for a password to open, it’s encrypted. With the password, you can remove it:
- Open the document with the password.
- Select File > Info > Protect Document > Encrypt with Password.
- Delete the password in the box and select OK.
- Save the document.
Without the password, Microsoft says there’s no way to open an encrypted document. Check whether you have an older unprotected copy, a version in OneDrive’s version history, or ask the person who created it. For how passwords work in Word, see how to password protect a Word document.
Troubleshooting
The ~$ lock file comes back
Word is still running, or a sync app such as OneDrive is holding the file. Restart your PC, then open the document before anything else.
“The document is locked for editing by” your own name
Another copy of Word on your own PC has it open, often after a crash. Ending the Word process in Task Manager and deleting the ~$ file fixes it.
Restrict Editing is grayed out
The document is in Compatibility Mode or opened as read-only. Save a copy with File > Save As as a .docx file and try again. See how to get out of Compatibility Mode.
I can’t save changes to a file on a network drive
You may only have read permission on that folder. Save the document to your own Documents folder, or ask the folder’s owner for edit permission.
Word for the web won’t let me edit
The file may be shared with you as view-only. Ask the owner to share it with edit access, or select Editing in the top-right corner if it shows Viewing.
Frequently asked questions
Can I unlock a Word document without the password?
Not if it’s encrypted with a password to open. If it only has editing restrictions, the author or anyone with the password can remove them. Ask the person who protected it.
Why does Word say my own file is locked?
Usually because Word didn’t close properly and left a lock behind. Ending Word in Task Manager and deleting the ~$ file clears it.
Will unlocking the document change its content?
No. Removing a lock or a read-only setting doesn’t change the text, formatting or comments.
How do I see an earlier version of the document?
If it’s saved in OneDrive or SharePoint, select File > Info > Version History. See how to see previous versions of a Word document.
Related: How to lock a Word document from editing.
Related: how to compare documents in Word.

Matt Jacobs has been working as an IT consultant for small businesses since receiving his Master’s degree in 2003. While he still does some consulting work, his primary focus now is on creating technology support content for SupportYourTech.com.
His work can be found on many websites and focuses on topics such as Microsoft Office, Apple devices, Android devices, Photoshop, and more.