Are you getting ready to print out a long document, and you either don’t have enough paper for it, or you want to use less paper? One way to accomplish this in Microsoft Word for Office 365 is by choosing to print more than one page per sheet.
Our guide below will show you where to find this option in Word’s Print menu so that you can cut the number of sheets of paper that your document uses in half or more. While this guide focuses specifically on printing four pages per sheet, you can even choose to print more than that on one sheet.
You can read our how to not print comments in Word guide if you have documents with comments but don’t want to include those comments in the printed copies.
How to Print More Than One Page Per Sheet in Microsoft Word
The steps in this article were performed in the Microsoft Word for Office 365 version of the application, but will also work with many other versions of Word as well.
Step 1: Open your document in Microsoft Word.
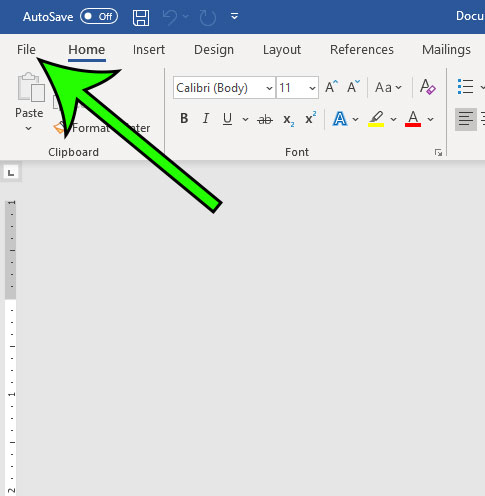
Step 2: Click the File tab at the top-left of the window.

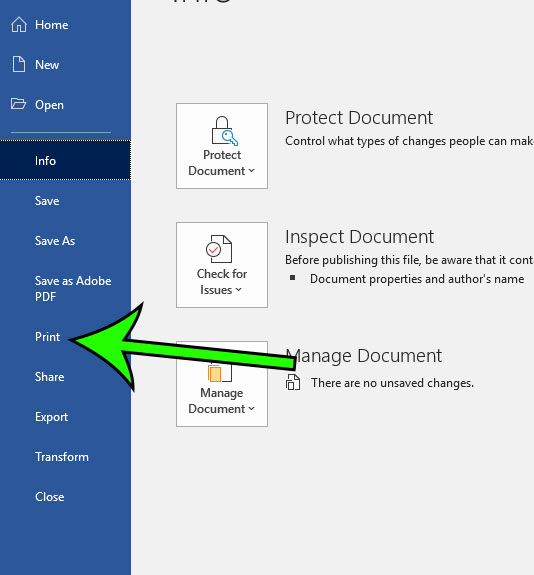
Step 3: Choose the Print option at the left side of the window.

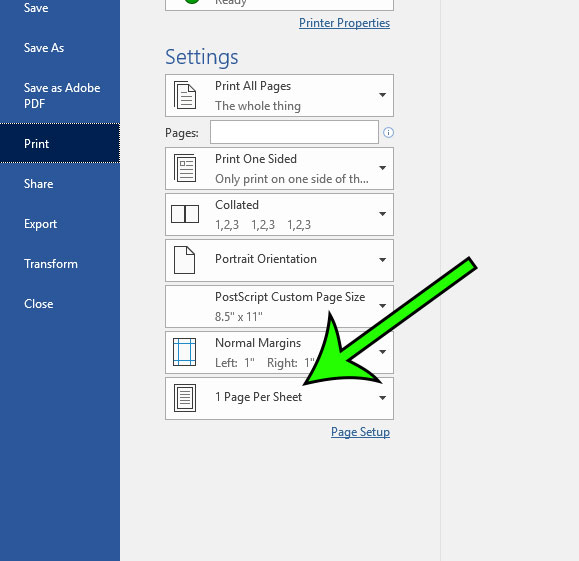
Step 4: Click the 1 Page Per Sheet button at the bottom of the center column.

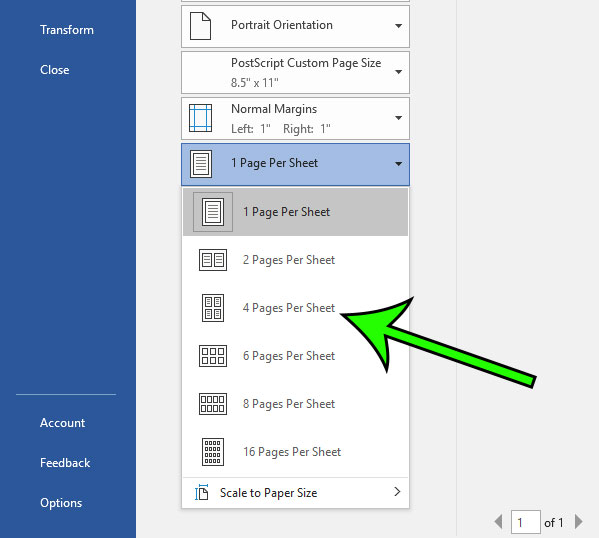
Step 5: Select the 4 Pages Per Sheet option.

Your document’s Print Preview pane will then update to display how this change affects the printing layout of the document.
Now that you know how to print four pages per sheet in Microsoft Word for Office 365, you can dramatically reduce the number of sheets of paper that you use when printing documents.
Is there text in your document that you don’t wish to include, but you also don’t want to delete it? Find out how to use strikethrough in Microsoft Word to effectively achieve that result.

Matt Jacobs has been working as an IT consultant for small businesses since receiving his Master’s degree in 2003. While he still does some consulting work, his primary focus now is on creating technology support content for SupportYourTech.com.
His work can be found on many websites and focuses on topics such as Microsoft Office, Apple devices, Android devices, Photoshop, and more.